
Optics Mag is reader-supported. When you buy via links on our site, we may earn an affiliate commission at no cost to you. Read more.
What Is the Exposure Triangle? Photography Basics Explained
Last Updated on

Have you just bought your first camera and are embarking on the wonderful journey of photography? Congratulations on following your passion. However, be prepared, as the road to success is a bit rocky. You will come across many concepts, such as shutter speed, ISO, and aperture, that may leave you overwhelmed, but a strong understanding of an exposure triangle will help you ace these basics with flying colors.
The exposure triangle is an analogy that defines three significant components—ISO, shutter speed, and aperture—and their relationship with each other. Let’s explore this concept in this article in detail and polish our photography skills together.

What Is an Exposure Triangle?
As summarized in the introduction above, an exposure triangle comprises three main elements: aperture, ISO, and shutter speed. These components work together to maintain the quantity of light that reaches the light-sensitive surface and the overall surface’s sensitivity.
ISO, shutter speed, and aperture make the three sides of the exposure triangle. And for a perfect photo with an ideal exposure, you need to make sure that all sides are balanced.
If you need to understand all the nitty-gritty details of an exposure triangle, you will have to explore these three components first. Below, we have explained each of these.
Aperture
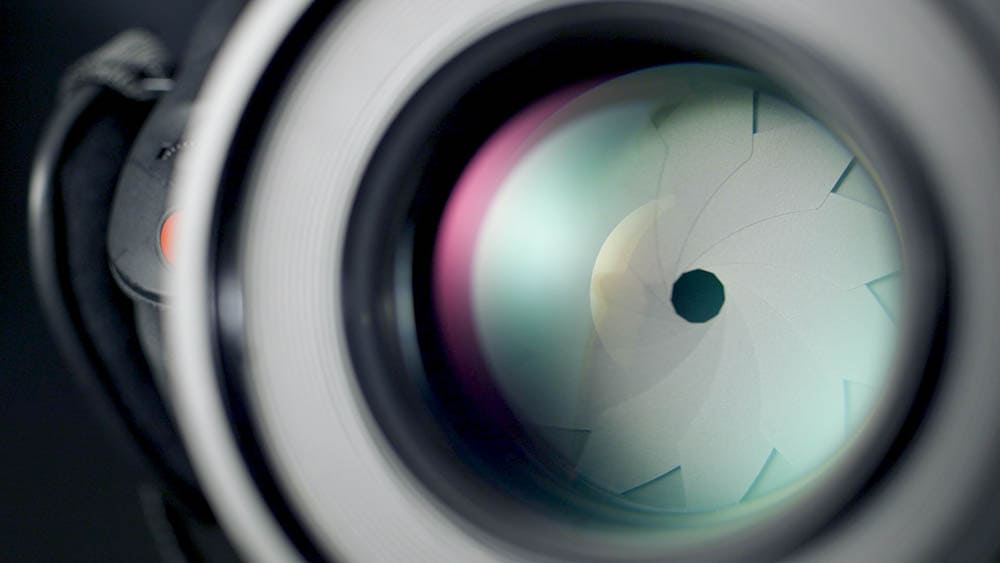
The aperture is the first side of an exposure triangle and is referred to as the lens opening. The wider this opening, the more light the camera sensor captures. However, if the lens opening is narrow, the resultant image will be less bright, reducing the overall exposure.
The size of the aperture is directly related to the f-stop. When you divide the lens’ focal length by its diameter, you get the f-stop ratio. This ratio may seem overwhelming. However, you can use it to calculate the aperture area with practice.
Aperture has a very common effect—depth of field. This concept refers to the relationship between aperture and focus area.
The narrower the aperture, the bigger the focus area is. Alternatively, if the aperture is greater, it results in a smaller focused area. This theory is imperative when understanding and adjusting your exposure triangle.
Shutter Speed

Shutter speed is another side of the exposure triangle and directly impacts it. This component relates to the duration your camera’s shutter remains open and exposes the sensor to the light.
So, if the length of the shutter speed is long, it allows your camera to capture more light and increase the length of the final exposure. Alternatively, a short shutter speed allows less light to hit the camera’s sensor, resulting in a less exposed final image.
Shutter speed is usually measured in seconds. Moreover, it has a strong effect called motion that should be considered when balancing your exposure triangle.
A fast shutter speed can help you capture various moving objects with ease. In addition, the long exposures can help photograph stars, rivers, and waterfalls.
ISO

As the third component of an exposure triangle, ISO controls and manages your camera’s sensor’s sensitivity. Therefore, it also plays a vital role in obtaining perfect exposure.
Most digital cameras use your lens’ aperture and shutter speed to naturally capture the light. Once that’s done, ISO artificially brightens up the image for better results.
Higher ISO values imply that the sensor doesn’t need to capture too much light for the correct exposure. However, lower ISO values indicate the need to capture more light to entertain adequate exposure. Unfortunately, raising the ISO value beyond your camera’s limits may create noise in your images, resulting in low-quality results.
The Working Mechanism of Exposure Triangle
It is now time to understand the mechanism of an exposure triangle. So, how does this concept work in basic photography?
We can’t deny that nailing this triangle’s balance is imperative to obtain photos with the correct amount of exposure. Therefore, it is vital to go into detail through two key concepts: exposure triangle balance and exposure triangle stop.
You need to explore the correct setting for your exposure triangle, and learning about exposure triangle stops is imperative.
Light directly impacts the final image, and the photography stops measure its amount. In short, it implies halving or doubling the amount of light that your camera’s sensor captures.
When you increase the shutter speed, you increase the stops and the amount of light. However, if you reduce your ISO, you also reduce the amount of light.
To put it simply, the photography stops increase with an increase in ISO values and shutter speed but a decrease in aperture. So, the balance in your exposure triangle is directly related to the number of triangle stops. And to achieve it, you have to make sure that all the sides of your exposure triangle are balanced.
When all of these sides are balanced, you achieve the correct exposure value or EV. This value is usually close to zero. According to the basic exposure triangle rule, whenever you choose to change a side of the exposure triangle, for the perfect balance, you also have to adjust the other sides too.
Suppose your exposure triangle has the EV equal to zero and is in perfect balance. But suddenly, you wished to increase the number of aperture stops. In that case, you will have to reduce your shutter speed and ISO stops to ensure that the EV remains zero after all the adjustments.
The exposure triangle works on compensation. For instance, if you have a fast shutter speed, either increase your ISO value or apply a broader aperture to maintain the balance of the exposure triangle.
Which Side of the Triangle Should You Adjust First?
Now, you may wonder which component of the triangle should be adjusted first. This adjustment depends on the photography object and the light available.
So, if you want to capture the milky way, you should use a wide aperture and reduce the shutter speed before adjusting the ISO. However, if you want to photograph a landscape, set your camera to a closed aperture and adjust the ISO or the shutter speed first, followed by the last component.
In most cases, you may see yourself adjusting the shutter speed or aperture before fixing the ISO. That’s because the first two directly impact the exposure, while ISO only helps keep the exposure triangle in balance.
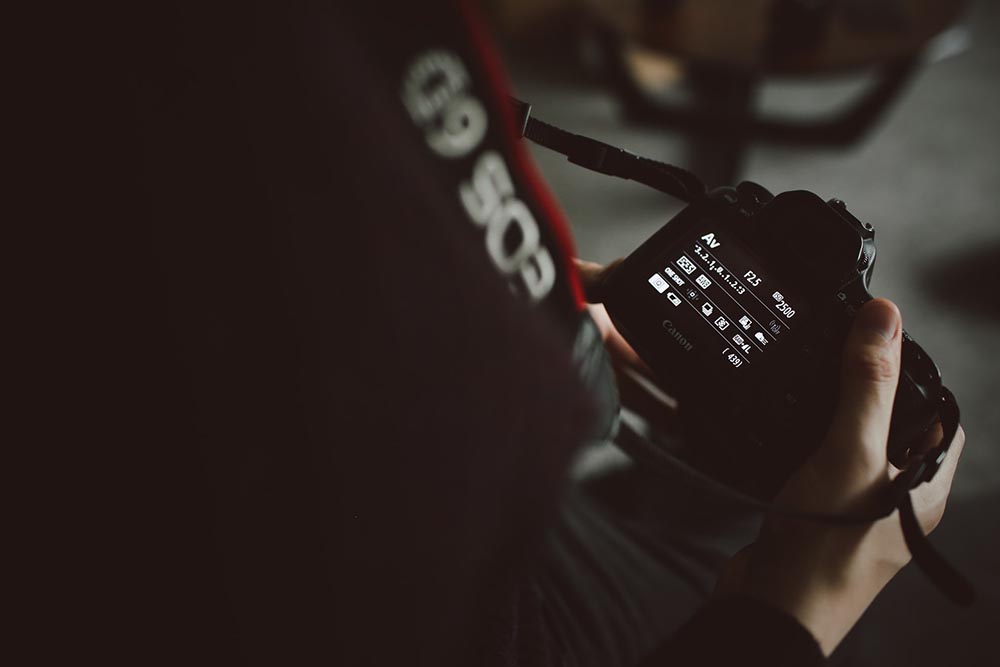
How to Use an Exposure Triangle
Do you want to practice an exposure triangle and ace this analogy? The steps below will help you practice this concept on your first day out with your camera.
- Start with switching your camera to manual mode. This mode will allow you to adjust the three components of the triangle independently so that you will understand the impact of each variable.
- Select the object you want to capture. Make sure that it is accessible as you are still learning.
- Adjust all the basic settings in your camera to attain an EV of zero.
- Set the shutter speed to achieve a median value in your exposure bar. You don’t want your images to be both over and under-exposed.
- If your shutter speed is too low, boost it and then widen your aperture, followed by the adjustment in the ISO.
- Finally, take a shot once your camera shows a well-exposed scene, and you are delighted with your shutter speed, ISO, and aperture.
- Keep practicing to help you balance the exposure triangle like a pro.

Final Takeaway
An exposure triangle defines the relationship between three significant components of photography: aperture, shutter speed, and ISO. Without one, it is hard to balance this triangle, leading to over or underexposed images.
Hopefully, this article has helped you get an insight into the world of an exposure triangle. If you want your work to stand out, you need to capture well-exposed scenes, which is impossible without a balanced exposure triangle.
Now that you know how to attain one, choose a setting and get to shooting. With practice and consistency, you will achieve your photography goal.
- See also: What Is Exposure Compensation?
Featured Image Credit: JESHOOTS.COM, Unsplash
About the Author Jeff Weishaupt
Jeff is a tech professional by day, writer, and amateur photographer by night. He's had the privilege of leading software teams for startups to the Fortune 100 over the past two decades. He currently works in the data privacy space. Jeff's amateur photography interests started in 2008 when he got his first DSLR camera, the Canon Rebel. Since then, he's taken tens of thousands of photos. His favorite handheld camera these days is his Google Pixel 6 XL. He loves taking photos of nature and his kids. In 2016, he bought his first drone, the Mavic Pro. Taking photos from the air is an amazing perspective, and he loves to take his drone while traveling.
Related Articles:
What Is the Best Binocular Magnification for Hunting? Optical Features Explained
How to Clean a Refractor Telescope: Step-by-Step Guide
How to Clean a Telescope Eyepiece: Step-by-Step Guide
How to Clean a Rifle Scope: 8 Expert Tips
Monocular vs Telescope: Differences Explained (With Pictures)
What Is a Monocular Used For? 8 Common Functions
How to Clean a Telescope Mirror: 8 Expert Tips
Brightfield vs Phase Contrast Microscopy: The Differences Explained