Optics Mag is reader-supported. When you buy via links on our site, we may earn an affiliate commission at no cost to you. Read more.
How to Collimate Binoculars: 9 Expert Tips
Last Updated on
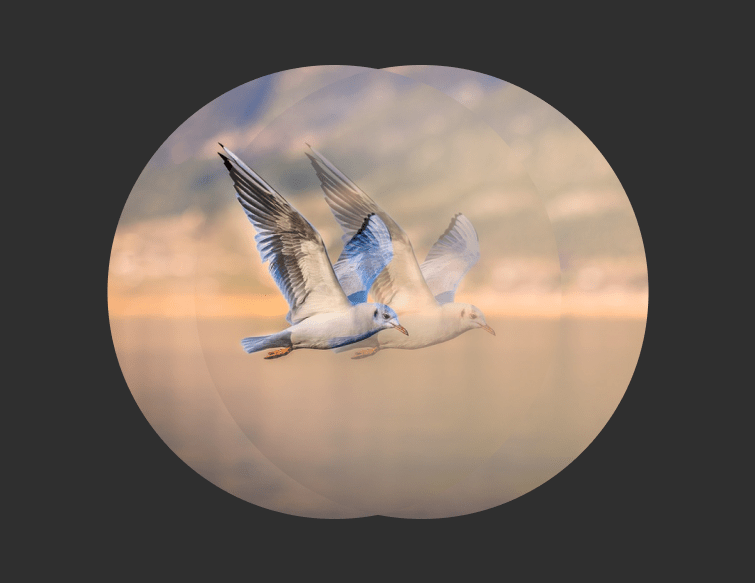
A pair of binoculars is a unique type of optical instrument, in that it features two tubes. And each one of those tubes usually houses prisms that are designed to be in sync. If for some reason they aren’t aligned, you only get to see blurred or double images. In other words, your binoculars are out of collimation.
In today’s guide, we’ll be showing you how to collimate your binoculars. We must remind you that these are pricey instruments. They often come with components that are not only fiddly but also fragile.
If you’ve never handled one before, or if you think you can’t make the adjustments on your own, reach out to a professional.
Before walking you through the process, we’ll first have to ensure that we all have the tools required to get the task done.
Necessary Equipment
Screwdriver: This will help you loosen the tiny screws that secure the different parts.
Tripod: You’ll definitely need something that can hold the device in a steady position while you work on the screws. That’s what the tripod is for.
Scalpel: To pry open the casing, you’ll need a scalpel.
Step-by-Step Collimation Guide
1. Mount the Binoculars on a Tripod
You have to get a tripod that has a very stable base because it’s sort of like our operating table. And the surface that you put it on has to be even or flat to prevent it from constantly moving. Mount your pair of binoculars on the tripod and ensure it’s steady.
Photo Credit: PhotoMagicWorld, Shutterstock
2. Find a Target
We’ve already established that the device is out of collimation. But to rectify that problem, we still have to try to focus the lens on a specific object that will act as our prime target. The object can be anything, quite frankly. You could use a tree, a house, a truck, a farming tool, etc. As long as it’s still and close to a mile away.
3. Test Collimation
Let’s find out if it’s indeed true that the prisms are out of sync. Are the images generated blurry? And more importantly, are they appearing in pairs? If the answer to both of those questions is yes, your work is cut out for you. It’s time to start making the necessary modifications.
Photo Credit: Atlantios, Pixabay
4. Pry Open the Plastic Casing
Like most optical instruments, binoculars come in different designs. And the designs have different features for a good reason. For example, some have plastic casings to ensure the internal components are well protected against corrosive elements.
If your pair has a plastic casing, you’ll have to pry it open using the scalpel. But be very careful while removing that casing because you can easily scratch your lens. We usually like to start removing the casing from any point that’s above the eyepiece.
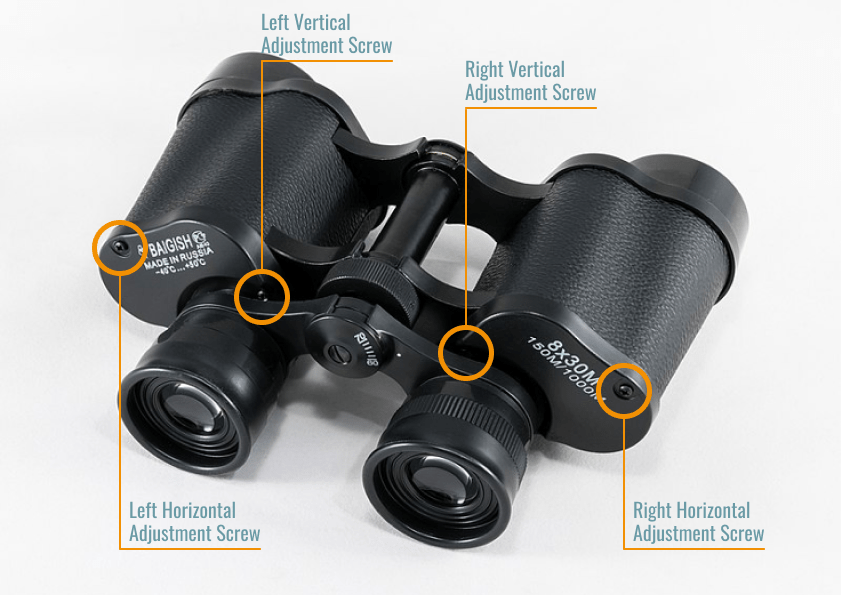
5. Find Adjustment Screws
The next step is to look for the adjustment screws. If you don’t know where they are located, grab your instruction manual. They are normally covered with plastic or glue, and that’s why they are hard to find.
From our experience, the vertical screws are often located at the center of the device, while their horizontal counterparts are at the back rim.
6. Adjusting Your Binocular Screws
The adjustment process is real work, by the way. You have to gently adjust both screws using your driver, while not forgetting to count every turn so that you can make more accurate adjustments later on—should you feel the need to.
Let’s start with the horizontal screws. Give the first one an eighth of a turn, and then move to the next one. We’ll be doing that repeatedly, in an alternating fashion. That’s the only way to guarantee that they are in line.
Once you’re done adjusting the horizontal screws, move on to the verticals. Make the adjustments the same way you did while working on the horizontal screws, to your point of satisfaction.
7. Tighten Your Horizontal Screws
You’ll have to tighten the screws after making your adjustments. It’s at this point that you’ll realize that tightening the horizontal screws is not as easy as one would think. That’s how it normally is with all binoculars, so don’t start thinking that your pair is broken.
While observing the targeted object, slowly turn the horizontal screws, and keep on turning until the images move halfway closer. You might feel the urge to make more adjustments to the screws in the process to preserve the image quality.
As you make the adjustments, you’ll get to a point where the images are no longer moving closer to the device, but further away. That’s how you know the horizontal adjustment is complete. Start working on the verticals.
Photo Credit: sdrug07, Shutterstock
8. Tighten Your Vertical Screws
Just so you know, your image won’t be centered even if the horizontal screws are well-adjusted. You still have to make the same adjustments on the vertical screws, to get a perfectly centered image that’s also clear.
So, start turning the screws the same way you did with the other ones, until you get a centered image. You’ll know it’s time to move on to the next step when the two images have morphed into one.
9. Test Collimation
To refocus the lens, return the right-hand knob to the original position. Then check the generated image, to gauge its quality. If the image is improved, defocus one of the lenses. We know this sounds counterproductive, but you have to make it such that one eyepiece gives you a blurry image, while the other produces a clear one. If the images are still synced up, you’ve successfully solved the collimation puzzle.
Collimation Tips
Binoculars are very delicate instruments. You’ve got to be careful while collimating them, especially if it’s your first time making the adjustments. Don’t operate on the device if you don’t have time to finish what you’ve started.
Collimation doesn’t take minutes, but hours. Well, that’s depending on the severity of the situation, as well as the design of the model you’re using. The point that we’re trying to drive home is that you’re going to experience a lot of back and forth. You’ll feel like your patience is being tested, and that’s when the frustrations start to set in.
Also, as a first-time user, go for the more affordable models. You won’t be as nervous as you would have been while operating on a pricey model, because you know you can afford to risk a few hundred bucks. Even though we believe in you, damaging any pair of binoculars is not that difficult—it only takes one wrong move.
Conclusion
To collimate a pair of binoculars, you first have to remove the casing. And while you’re making your adjustments, keep track of everything. Don’t forget the directions of the turns or the number of turns you made. Because if you do, you’ll be forced to start the whole process again.
Robert’s obsession with all things optical started early in life, when his optician father would bring home prototypes for Robert to play with. Nowadays, Robert is dedicated to helping others find the right optics for their needs. His hobbies include astronomy, astrophysics, and model building. Originally from Newark, NJ, he resides in Santa Fe, New Mexico, where the nighttime skies are filled with glittering stars.