
Optics Mag is reader-supported. When you buy via links on our site, we may earn an affiliate commission at no cost to you. Read more.
How to Use a Microscope: Beginner’s Guide (Easy Steps)
Last Updated on

Microscopes have entirely transformed our understanding of the world, as well as how we interact with it. Because of microscopes, massive advances have been made in many areas, including medical and scientific fields. But you don’t have to be a top-level scientist to use a microscope. Today, these devices are widely accessible, and anyone can learn to start observing the microscopic world.
In this article, we’re going to help you foster your love of science by walking you through the steps of how to use a microscope. This will be a beginner-friendly guide, so no experience is necessary. Even if this is your first time using a microscope, there’s no reason to be intimidated. The process is quite simple, and anyone can do it. But before we get into the specific steps you have to take, let’s discuss what a microscope does and all the info you need to know before we put slide to stage and start our observations.

What Does a Microscope Do?
Microscopes allow us to see things that are too small to observe with the naked eye. They do this by magnifying the object we’re viewing many times over, making it appear much larger to us as we view it through the objective lens of the microscope.
But the object isn’t just larger as we look through the microscope. If you’re using the most common type of microscope, the compound microscope, there will be light passing directly through the specimen, allowing you to see what’s going on inside of it.
Types of Microscopes
When we talk about microscopes, it’s important to understand that there are several types of microscopes that work in different ways.
Compound Microscope
Compound microscopes are the most common, and likely the type that you’ll be using. These allow you to see through an object by passing light through a slide on which your specimen is prepared. Using a compound microscope, you can view living and dead specimens, even as small as individual cells.
Stereo Microscope
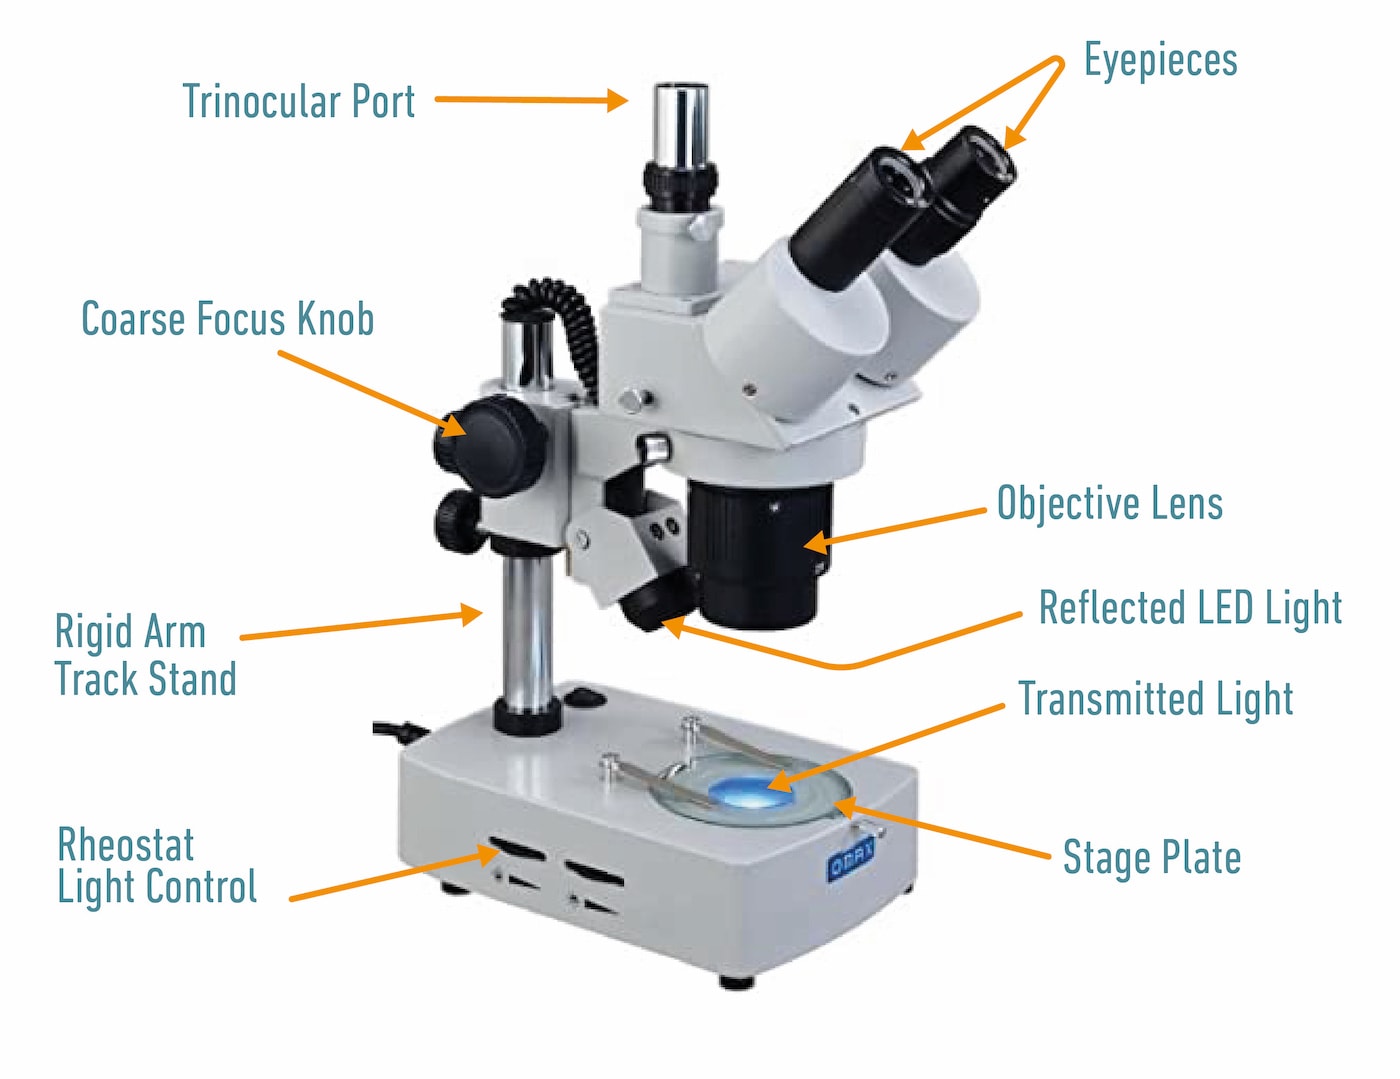
Stereo microscopes are also quite common, though not as prevalent as compound microscopes. These tools are used for viewing larger objects. They offer a three-dimensional image, instead of the two-dimensional image you get from a compound microscope. With a stereo microscope, the light doesn’t pass through the object you’re viewing. Rather, it reflects off of the object, which is why it’s best for viewing opaque objects that are rather large, such as minerals, fossils, flowers, coins, etc.
Specialty Microscopes
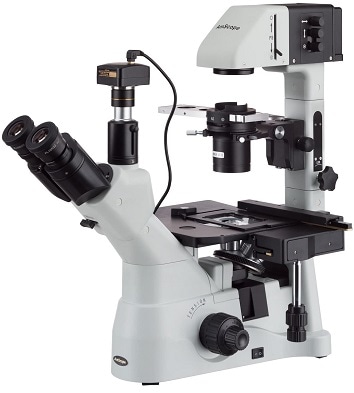
While compound and stereo microscopes are by far the most common types of these tools, there are quite a few other varieties of microscopes that have their own specific uses. Generally, these are rather expensive devices that you’re far less likely to ever use. Specialty microscopes include electron microscopes, inverted microscopes, polarizing microscopes, metallurgical microscopes, and more.

Important Terms
When discussing microscopes, there are a few terms that you’ll want to know and understand to make communication easier.
Resolution
Resolution is the ability of the microscope to distinguish two objects from each other. Microscopes with higher resolution are capable of achieving greater magnification without blurring the image.
Magnification
Magnification is a measure of how much larger an object appears when you view it through the microscope.
Slide

The slide is a small piece of glass upon which you will prepare your specimen for viewing through a compound microscope. Since the light must pass through the specimen on such a microscope, the slide is completely clear, enabling the light to reach the specimen.
Specimen
Your specimen is the item that you’re viewing with the microscope. When using a compound microscope, the specimen will be prepared on a glass slide.
Stage
Once your slide and specimen are prepared, you’ll place them on the stage. This is a small table on the microscope that holds the slide in place with clips so it won’t move during viewing.
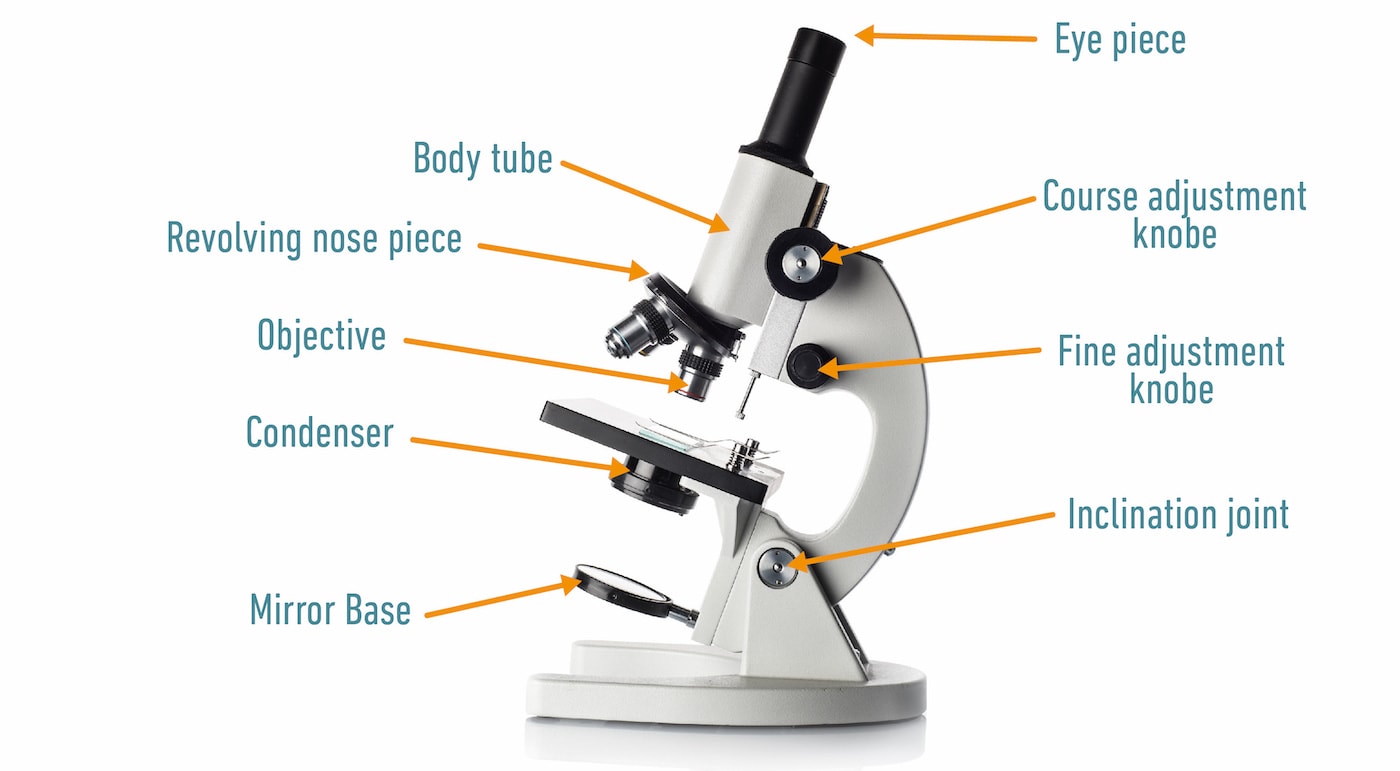
Objective Lens
Objective lenses are lenses that supply magnification. A compound microscope will have several; generally, between two and four. Each one offers a different level of magnification, allowing you to quickly change your view without making major alterations to the microscope or your slide.
How to Use a Microscope
Now that we understand the basics of what a microscope does and all the related terminology, it’s time to talk about actually using a microscope. While it might seem daunting if you’ve never used one before, it’s a pretty simple process that anyone can accomplish.
Step 1: Prepare a Slide

Before you can view anything, you must have a specimen prepared. To do this, get your specimen and a slide ready.
- Start by placing a drop of water on the slide.
- Gently place your specimen in the drop of water with a pair of tweezers.
- Slowly place the edge of a coverslip on the slide, touching the edge of the water drop.
- Lower the coverslip onto your specimen, ensuring you don’t trap an air bubble in the process.
Once your slide is ready, you can move to step two.
Step 2: Secure the Slide
Once your slide is prepared, you’ll need to secure it to the stage; the flat table that’s attached to your microscope. Make sure to move slowly and deliberately so you don’t accidentally damage your slide. Place it on the stage and secure it using the clips, which hold onto the edges of the slide. Ensure that your specimen is directly over the hole that light will come through.
Step 3: Select an Objective Lens
Now that your slide is secured to the stage, you’ll have to turn the objective lenses so that one is positioned directly over your slide. Make sure you always start with the lowest power objective lens first. When you have the lowest power objective lens centered over the slide, turn the microscope on and move to step four.
Step 4: Focus the Image
With the microscope on and your slide in position, you’re ready to start viewing. But when you look through the eyepiece the first time, what you see won’t look the way you might expect. It should be blurry and out of focus, which is what we’re about to fix. Naturally, you need to get your specimen in focus if you want to view it.
Start by using the coarse adjustment knob. This knob will lower and raise the height of the stage that your slide is secured to. Be careful during this step as you can easily hit the specimen on the objective lens, which can damage or even ruin your slide.
As the image starts to become clearer, it’s time to start using the fine focus knob. This will give you much more precise control over the focus, allowing you to dial it in for a sharp image. At this point, you’re ready to start making observations.
Step 5: Adjust Magnification
Of course, you don’t want to do all of your viewing on the lowest setting your microscope offers. Likely, you’ll want to increase the magnification to get a more detailed view. Luckily, this is an easy process. Simply turn the lenses and select a new objective lens. The larger the lens, the more magnification it offers.
Once again, make sure you do this carefully. If your stage is already high, you could easily hit the slide with an objective lens while selecting a new one.
Also, be aware that you’ll likely have to refocus every time you change lenses. It’s not a difficult process, but you probably won’t have a clear view right off the bat when you switch to higher magnification.
Tips for Using a Microscope

Now, you know how to use a microscope. But some lessons come with experience. The following tips are all lessons that you’d likely learn through trial and error, but we’re going to save you some time and frustration by offering you three tips that we think are vital when using a microscope.
1. Carry it carefully
Microscopes are sensitive instruments and they’re pretty easy to damage. One drop means that all of the expensive glass lenses inside could shatter, or at least end up misaligned. Even holding it wrong can put pressure on the wrong items, causing damage and interfering with proper use. As such, it’s important to always carry your microscope with one hand under the base, and your other hand holding the arm of the microscope.
2. Start and end on the lowest setting
Whenever you’re viewing a new specimen, always start on the lowest powered lens. This lens has the widest field of view, which will allow you to more easily locate your specimen. It’s also a good idea to switch back to the smallest objective lens after viewing. That way, it’s already selected when you go to set up a slide the next time.
3. Move closer if you see eyelashes
Finding the proper viewing distance from the eyepiece is critical, though it can be a bit difficult; particularly for new microscope users. But here’s a little tip: if you can see your eyelashes, you need to move closer!
•You might also like: What Is Confocal Microscopy Used For? The Interesting Answer!
Final Thoughts
Microscopes are a marvel of modern technology, allowing us to see things too small for the naked eye. We can even view individual cells using these powerful tools. And today, they’re affordable enough that individuals can keep high-powered microscopes in their home for hobby use. If you’re new to microscopes, don’t let it overwhelm or intimidate you. Everyone started at the same place with zero knowledge. Just follow the easy steps we’ve laid out for you in this article, and you’ll know how to use a microscope and be viewing specimens like a pro scientist before you know it.
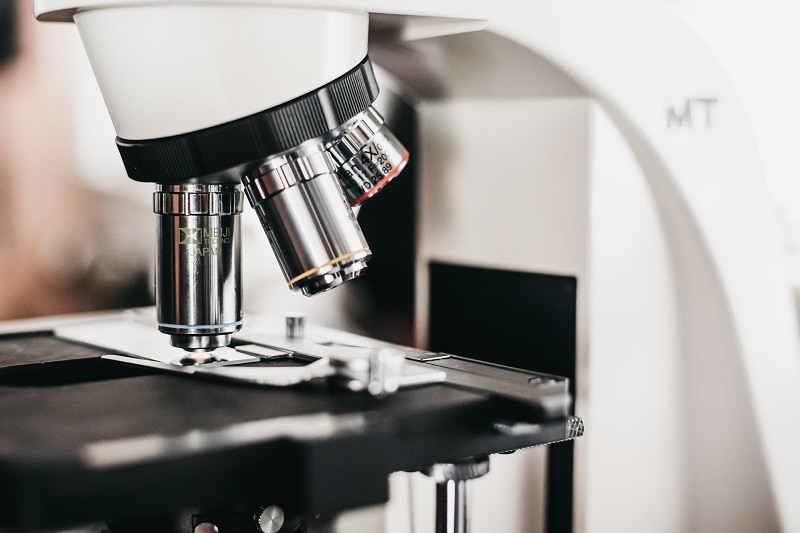
Featured Image Credit: Artem Podrez, Pexels
About the Author Dean Eby
An avid outdoorsman, Dean spends much of his time adventuring through the diverse terrain of the southwest United States with his closest companion, his dog, Gohan. He gains experience on a full-time journey of exploration. For Dean, few passions lie closer to his heart than learning. An apt researcher and reader, he loves to investigate interesting topics such as history, economics, relationships, pets, politics, and more.
Related Articles:
How to Clean a Refractor Telescope: Step-by-Step Guide
How to Clean a Telescope Eyepiece: Step-by-Step Guide
Can You Use Binoculars to Look At Stars? How to Choose the Right Pair
How to Clean a Rifle Scope: 8 Expert Tips
Monocular vs Telescope: Differences Explained (With Pictures)
What Is a Monocular Used For? 8 Common Functions
How to Clean a Telescope Mirror: 8 Expert Tips
Brightfield vs Phase Contrast Microscopy: The Differences Explained