What Are Dissecting Microscopes Used For? What to Know!
Last Updated on

Microscopy, by definition, is a field of study that specializes in the investigation of tiny specimens, with the help of an instrument designed to provide a larger and better viewing — a device popularly known as, the microscope.
Like most tools, we have different iterations of a microscope, all ergonomically designed to facilitate efficiency and serve a particular purpose. The dissecting microscope is just one of the many models designed. Dissecting microscopes are designed to show you a 3D image of a specimen.
Let’s learn a thing or two about this iteration, and then move on to its purpose.

What is a Dissecting Microscope?
We’ve always called it the dissecting microscope, but to some people, it’s known as a stereoscopic or stereo microscope. Nonetheless, the name does not change its primary function, which is to give the user an elaborate three-dimensional image of the specimen under investigation.
It’s possible thanks to the angled eyepieces (there are two of them) deliberately installed into the design to provide a remarkable peripheral vision. The kind of vision that’s a requisite for the creation of a three-dimensional visual.
Both eyepieces have the same magnification range, with the lowest being 10X and a high of 40X. However, what makes it different from the compound microscope is the source of light being used. Unlike the compound device, this one doesn’t rely on the light being reflected through the surface, but from it.
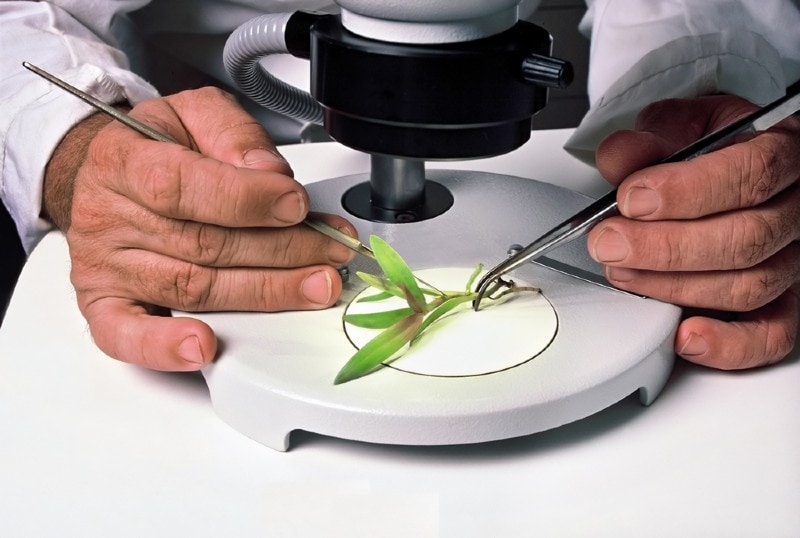
What that means is that with the stereo microscope, you’ll be able to magnify specimens of subjects that cannot be effectively magnified using a compound instrument. Specimens that are opaque in nature, such as insects, wood, metal, leaves, flowers, and so forth.
The Conception of The Stereoscopic Idea
Cherubin d’Orleans was a French monk born in 1613. When he was 64 years old, he felt the need to design a small optical device that had the typical objective lenses and two eye lenses. He’s the guy credited with the invention of the first makeshift dissecting microscope.
The funny thing is, he never knew how big the invention would be in the years to come. In fact, he died 20 years later not knowing the kind of impact that he had on the world.
The microscopy principles applied during that period are the same applied to our modern devices. We’ve certainly improved some of them, but that doesn’t take away the fact that Cherubin d’Orleans remains the founding father of microscopy.

The Functions of a Stereo Microscope
This instrument is called the ‘dissecting’ microscope for a reason. It’s the type of tool that gives you the option of navigating its microscopic functionalities in real-time while observing the changes.
In general, its main purpose is to provide users with a wider perspective of an object under investigation or being studied. But if we were to dive deeper into details, these are the examples we would give:
Botanical Application
In the stereo microscope’s feature list, you’ll find the outer-surface function. This function is different in the sense that it allows users to study any specimen’s external properties, without relying on a high magnification power. It offers a wider field of vision, thereby enhancing the microscopic abilities of the device.
Botanists prefer using the dissecting microscope while studying various flower and plant species, as the function guarantees optimal results.
Gemological Uses
If at all you’re not familiar with this field of study, just know it’s a branch of mineralogy. And as a geoscience, it purely deals with different gemstone materials, both artificial and natural. And you cannot study any mineral without the help of a microscope. Especially if you’re only interested in learning about their qualities and grades.
What makes the stereoscopic tool ideal for this study is its double-lighting function. Without it, gemologists wouldn’t be able to view or even examine any specimen characterized by flat, glossy surfaces.
Biological Dispensation
The idea of coupling a wider field of vision with a wider range of magnification has made the stereo microscope one of the best optical tools in the industry. Its view dimensions are unrivaled, and the reason why surgeons vouch for it anytime we’re having discussions regarding the best instruments for micro-surgeries.
College Laboratory Experimentations
The dissecting microscope provides the best of both worlds in that it’s suitable for new users and advanced applicability. Its low magnification power is what makes it ideal for students looking to learn how to use this type of equipment, without feeling overwhelmed by the advanced features.
Also, tutors who wish to teach using the dissecting microscope always have the option of giving their students a larger, if not wider view, of the various parts of an animal species.

Dissecting Microscope: The Main Parts
Ocular Lenses
The ocular lenses are the parts known as the eyepieces. To be able to examine or view your specimen, you’ll have to look through this feature.
The compound microscope also has eyepieces, but they are not interchangeable with the one installed on this stereo microscope.
The eyepiece enlarges or magnifies the image of the specimen that will be projected once processed by the objective. In other words, it’s the heart of all operations conducted by the instrument. Without it, you’ll never be able to increase the object’s image size.
https://www.instagram.com/p/Cc4sn7BLcTv/
Objectives
Working with the ocular lenses in tandem, are the objectives—yet another critical component to take note of. The eyepieces do magnify the image projected, but the objectives magnify the object. That’s to say, this feature is the chief magnifier. It feeds the oculars an already magnified image, begging them to magnify it further.
The clarity of the image produced will depend on the amount of light available (obviously) and the material used to construct the lenses. If you end up buying a dissecting microscope that has plastic objectives, your images won’t be as crisp as those generated by one made of glass.
There’s a difference between the positioning of the objective lenses installed in a compound scope and those found on this device. The former has lenses attached to the nosepiece, while the latter has its objective installed in a cylindrical cone. That’s the reason why the dissecting instrument doesn’t have visible objective lenses.
Adjustment Knobs
The dissecting microscope has knobs everywhere. And they can be confusing to an untrained professional who’s never handled such a piece of equipment before. Its knobs offer various functionalities, to guarantee an optimal user experience.
Light Adjustment Knob
Dissecting microscopes usually have different designs because the models are different. Some have two light adjustment knobs, while others come with one. If your scope has an overhead light source, it will have a single light adjustment knob. But if it has an additional light source at the stage, its light intensities will be controlled by two knobs, positioned opposite each other.
Focus Knob
This knob is also called the coarse knob, and it’s often positioned on the device’s arm. If your model doesn’t come with a sturdy arm, they’ll install it on the main body, somewhere conspicuous. The work of the coarse knob is to lower or raise the head and its objective lenses, thereby bringing the specimen’s image into focus.
Zoom Knob
This knob will be right below your ocular lenses. And as you might have guessed, its chief function is to zoom in on an object.
Stage Plate
The plate is the platform that holds the specimen, meant for examination. Some brands have produced dissecting scopes with reversible black and white plates, to make sure there’s a contrasting background between it and the object. Consequently, making the image generated clearer.
Lighting
Some scopes have one lighting source, others have two. Those that have one, will have the feature installed at the top—it will be shining down on the specimen. The ones that have two lighting sources will have the other source at the bottom, transmitting light to the object under observation. That light is meant to make the specimen translucent.

Final Thoughts
We would like to wrap this up by reminding you that a microscope is a fragile device. So, when you’re handling it, try to handle it with a lot of care. Carry it using both your hands to prevent any slip-ups, and don’t bump it into anything. If you’re done working, cover it and place it on a stable platform. That’s how you guarantee a longer lifespan.
Featured Image Credit: Steve Lovegrove, Shutterstock
About the Author Robert Sparks
Robert’s obsession with all things optical started early in life, when his optician father would bring home prototypes for Robert to play with. Nowadays, Robert is dedicated to helping others find the right optics for their needs. His hobbies include astronomy, astrophysics, and model building. Originally from Newark, NJ, he resides in Santa Fe, New Mexico, where the nighttime skies are filled with glittering stars.
Related Articles:
What Is the Best Binocular Magnification for Hunting? Optical Features Explained
How to Clean a Refractor Telescope: Step-by-Step Guide
How to Clean a Telescope Eyepiece: Step-by-Step Guide
How to Clean a Rifle Scope: 8 Expert Tips
Monocular vs Telescope: Differences Explained (With Pictures)
What Is a Monocular Used For? 8 Common Functions
How to Clean a Telescope Mirror: 8 Expert Tips
Brightfield vs Phase Contrast Microscopy: The Differences Explained
