
Optics Mag is reader-supported. When you buy via links on our site, we may earn an affiliate commission at no cost to you. Read more.
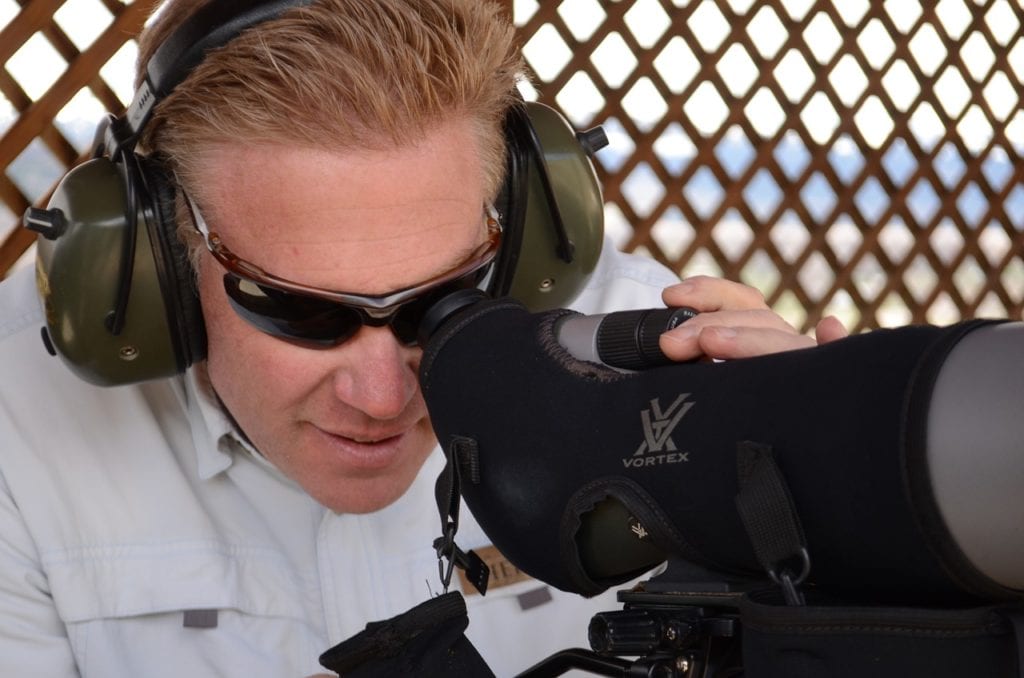
How to Take Photos Through a Spotting Scope (Digiscoping)
Last Updated on

While it’s a joy to go out and watch everything that nature has to offer, taking that to the next level and taking photos is a great way to capture memories and share the experience with others.
But when you’re ready to take that next step, you’ll find that it’s a little more complicated than strapping a camera on and hoping for the best. In this comprehensive guide, we’ll break down everything you need to know about digiscoping before you begin.

Important Things to Know
Before you get started with digiscoping, there a few things you need to know before you go out and take a bunch of blurry photos. While these are essential tips, you need to apply them when following our step-by-step guide for the best results.
Choosing Your Camera
If you’re looking to take photos through a spotting scope, not every camera is created equal. For starters, if you’re using a DSLR camera, you’ll need to be able to make manual adjustments – not rely solely on preset modes.
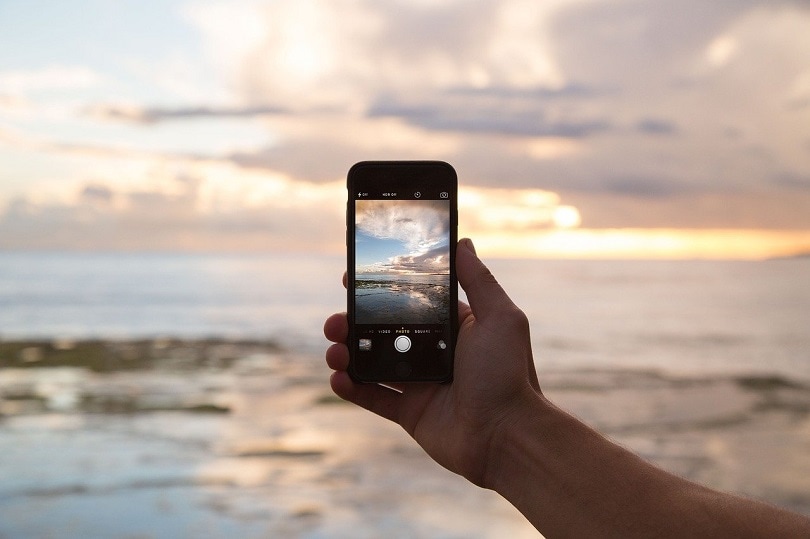
Meanwhile, you can avoid some of the frustration by sticking with a smartphone or a point-and-shoot camera. While point-and-shoot cameras used to offer clear advantages over smartphones, with the cameras on smartphones improving dramatically over recent years, they’re relatively equal to each other regarding ease of use and image quality.
Keeping Everything Steady
While you’re probably aware that you need to keep everything still to get a clear picture if you’ve never digiscoped before, you’re not prepared for how much even the slightest vibrations can disturb your image.
That’s because the higher the magnification, the more the smallest movements will disturb your shot. When you’re digiscoping a tripod that you can mount your setup on is a must.
If you think that you can hold your camera still long enough to capture your image, you’re going to end up with a bunch of blurry photos – especially considering that you need longer exposures when digiscoping to get a high-quality image.
If you want crisp images, find a way to keep your setup steady at all costs.
Use a Lens Hood
While lens hoods are a good idea for most photography sessions, it becomes even more critical when you’re digiscoping. While you need plenty of light to get a clear image, that light needs to be coming from the right direction.
Excessive light coming in from different directions can wash out your photo, leading to a low-quality image where you don’t get the sharp contrasts in color that you were expecting. A simple lens hood or dew shield solves that problem.
- Related read: How to Take Pictures Through Binoculars
Photoshop the Results
Once you’ve taken your photos, don’t stop there. Upload them to a photoshop program and at least work out the minor blemishes. Many programs will allow you to optimize contrast and brightness with the click of a button, and these small changes can have significant results.
You don’t need to use photoshop itself as there are many different programs that you can use. But once again, if you’re looking for the best quality results, you’re not going to beat what photoshop has to offer.

The Step-by-Step Guide
When you’re ready to take the leap and start digiscoping, this is where you need to start. Whether you’re hooking up a DSLR or taking pictures with your smartphone, this step-by-step guide will take you through everything you need to know to take high-quality photographs!
Picking Your Camera – DSLRs vs. Smartphones
It’s the first step in deciding what setup you need – picking your camera. While there are tons of options out there, it really depends on your experience level on what’s best for you. For most beginners, a smartphone is the way to go.
If you’re finding that you’re not getting the images you’re looking for, you can upgrade to a DSLR with a little more experience, so the transition is easier. Below we’ll break down the advantages of each setup, that way you can decide which setup is best for you.
Advantages of a DSLR
If you’re an experienced photographer and already know a bit about what you’re doing, a DSLR can be a great choice when digiscoping. Just keep in mind that you’re going to know a bit of F-ratios and exposure time.
We’ll walk you through a crash course later, but if you’ve never heard those terms before, there’s going to be a steep learning curve as you enter the world of digiscoping.
But while those things can be a little daunting at first, once you master them, you’ll actually get more control over your photos. You’ll be able to set the exposure times, get the ideal F-ratio, perfect the ISO, and everything else that goes into a photograph.
Not only will you get higher quality images, but you’ll get the ability to perfect your shot in the way that you want it. You simply can’t do that with a point-and-shoot camera or a smartphone.
- Higher quality images
- More control over your photographs
Advantages of a Smartphone
Whether you’re planning on using a point-and-shoot camera or a smartphone, the advantages are the same. First, they’re the most straightforward setup to use. You don’t have to worry about making any of the adjustments on your own, as your smartphone can make the necessary adjustments even when it’s hooked up to the spotting scope.
Making it even easier is the fact that you don’t even have to manually set up each photo. While this will generally increase photo quality, many individuals are perfectly content with taking a video and taking photos from freezeframed portions of the video.
The image quality will vary depending on your smartphone’s camera, but top-end models can produce decent quality images this way.
Finally, while DSLR cameras are expensive and you’ll need to purchase separate adapters to get a remote capture ability, most people already have a smartphone, and you can often utilize a remote capture right off of a pair of headphones.
These two factors often make utilizing a smartphone for digiscoping a more affordable option for those on a tighter budget:
- Easy to use – no need to make manual adjustments
- You can take videos and pull images from them
- Often a cheaper setup
Buying the Right Adapter
Once you’ve decided on the type of camera that you’ll be using, you need to find the right adapter to take your shots. There are tons of adapters out there, and there are two things you need to consider when picking out your adapter.
First, you need to consider the exact type of camera that you’re using. Yes, you’ve already decided between a point-and-click, a smartphone, or a DSLR – but now you need to pick down the exact model that you’re going with.
An adapter that works with an iPhone typically won’t work with a Samsung Note 20 and vice versa. In the same way, an adapter that works for a Canon DSLR might not work with a Nikon DSLR. Find the right adapter for your specific camera!
Second, you need to make sure that the adapter will work with your specific spotting scope. While these tend to be a little more universal, that doesn’t mean that one adapter will work on every setup. Verify that your adapter will work with your scope before you make any purchases.
Mount Your Camera
Once you’ve got your camera and adapters picked out, go ahead and hook everything up. Most adapters make this reasonably easy to do. For DSLRs, you get a T-mount that you screw onto the lens with some compression rings and a collar that attaches to your spotting scope.
For smartphones, it’s even easier. Typically, the adapter will screw directly onto the spotting scope, then all you need to do put your smartphone on the mount. As long as you got the right adapter for your specific phone, the camera should line up, and you’re good to go!
Once you’ve mounted the camera, mount the spotting scope to your tripod, and you’re ready to head out to take some pictures!
DSLR Specific Steps
If you’re using a point-and-shoot camera or a smartphone, that’s all you need to do to start digiscoping. It’s easy and fun, but you won’t get the highest-quality images. If you’re looking for better photos, you’ll need to use a DSLR, which means you’ll have a few more steps to follow during the actual image-taking process.
We’ll walk you through everything you need to know here.
Pick the Best F-Ratio
If you’re using a DSLR camera, you can’t rely on automatic adjustments, and the most important ratio you need to master to get quality images is the F-ratio. In technical terms, the f-ratio is the lens diameter divided by the focal length – but unless you’re already in-tune with the technical jargon, that doesn’t mean much.
Instead, look at it as how much light you’re getting into the camera with each shot. The smaller the ratio, the more light you’re letting in. This is important because too much light, and you’ll get a “washed photo.” Too little light, and you won’t get a clear picture.
Keep in mind that if you’re taking pictures of a fast-moving target – like a bird – you’ll need a lightning-fast shutter speed, which means that your camera won’t have a ton of time to bring in light. Because of this, you want an F/6 ratio or faster (a smaller number is faster).
Finding the perfect F-ratio for your shots is going to take a little practice, but the more photos you take, the better you’ll get at it!
Pick Your Location and Hope for the Best
If you’re taking pictures of a fast-moving target, you’re not going to be able to make the adjustments quick enough to get a good quality shot. Instead, you should pick a branch or another target and make your adjustments.
This takes a lot of patience, skill, and a little luck. Because you’re picking a location before the target comes into view, you’re hoping that the target of the picture will come into the frame after you’ve made all your adjustments.
While you don’t have to worry about this as much with slower-moving targets like bears and goats, you’re still going to have to make your adjustments after you line up each shot, and this is going to take a bit of time.
Conclusion
Digiscoping is a great way to expand your repertoire and get others interested in the sport. Whether you’re birding, hunting, exploring wildlife, or any of the other vast array of activities you could be doing while taking photos through a spotting scope, digiscoping is a great way to capture memories and share them with others.
While it used to be firmly in the territory of the photographically inclined, with so many options for smartphones and point-and-shoot cameras, there’s no reason that everyone can’t dive into the world of digiscoping!
You might also be interested in some of our most favorite posts:
- How to Mount a Scope on an AR-15 – Easy Beginner’s Guide
- How Far Can a Telescope See?
- Prism Scope vs Red Dot Sight: Which Is Better?
Featured image credit: WolfBlur, Pixabay
About the Author Robert Sparks
Robert’s obsession with all things optical started early in life, when his optician father would bring home prototypes for Robert to play with. Nowadays, Robert is dedicated to helping others find the right optics for their needs. His hobbies include astronomy, astrophysics, and model building. Originally from Newark, NJ, he resides in Santa Fe, New Mexico, where the nighttime skies are filled with glittering stars.
Related Articles:
How to Clean a Refractor Telescope: Step-by-Step Guide
How to Clean a Telescope Eyepiece: Step-by-Step Guide
How to Clean a Rifle Scope: 8 Expert Tips
Monocular vs Telescope: Differences Explained (With Pictures)
What Is a Monocular Used For? 8 Common Functions
How to Clean a Telescope Mirror: 8 Expert Tips
Brightfield vs Phase Contrast Microscopy: The Differences Explained
SkyCamHD Drone Review: Pros, Cons, FAQ, & Verdict