
Optics Mag is reader-supported. When you buy via links on our site, we may earn an affiliate commission at no cost to you. Read more.
What Is the Proper Way to Carry a Microscope? Tips & FAQ
Last Updated on

When carrying a microscope, you should grasp its arm using your dominant hand and lift it slowly with your other hand. Make sure you hold the base firmly when carrying it so that the microscope doesn’t tip over.
You should also avoid bumping the microscope or dropping it, as this can damage the optics inside. If you need to transport the microscope for a long distance, it’s best to put it in a padded case to protect it from jostling around.
Keep reading to learn more tips about caring for a microscope.

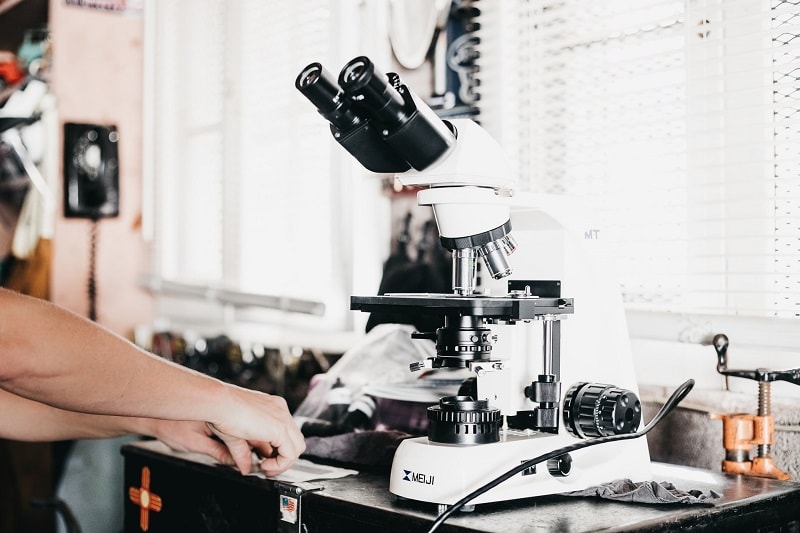
How to Carry a Microscope
First, you should know that some parts of a microscope are incredibly fragile, so be careful not to drop it or bang it around. If you’re going to be carrying your microscope around often, it’s a good idea to get a padded case or bag specifically designed for microscopes.
Tips:
- The safest way to carry a microscope is to keep one hand on the base and the other around the microscope’s arm.
- Do not touch the lens or the stage, as these are delicate parts of the microscope that can be easily damaged. If you must touch the lens, only do so with a soft, clean cloth.
- When you’re ready to transport your microscope, ensure the power is off and the stage is locked in place.
- Then, gently lift the microscope by the base, careful not to bump the lenses or other fragile parts.
- If you’re traveling with your microscope, wrap it in a soft cloth or towels for extra protection.
- Then, when you get to your destination, set up your microscope on a stable surface and make sure everything is secured before turning it on.

How to Put a Microscope Down
When you move a microscope from one place to another, you should always carry it by the base. If you bump the stage, you could damage your slide or the microscope itself.
Tips:
- Make sure the microscope is turned off and unplugged before leaving it.
- It’s also important to know where to put the microscope beforehand. Don’t reach a cabinet and try opening it with one hand while holding the microscope in the other.
- Open the cabinet or case before you carry the microscope.
- Find a level surface when you’re ready to put the microscope down.
- Gently set the microscope down on its side, so the stage faces up.
- If there’s a dust cover, put it on to protect the lenses.

Mistakes to Avoid While Carrying a Microscope
Many students and professionals new to microscopy make several cardinal errors while working with these delicate instruments.
Since microscopes are expensive and often fragile, it is essential to be extra careful while using them. Below are some mistakes to avoid while carrying a microscope.
Carrying the Microscope by the Lens
The lens cannot take the weight of the microscope, so carrying it by the lens is a big no-no. Instead, it is best to carry the microscope by its arm or base.
Picking Up the Microscope With One Hand
No matter how lightweight your microscope is, you should always pick it up using two hands. It will help keep the instrument balanced and prevent it from toppling.
One hand goes on the arm of the microscope and the other under the base. The hand under the base will stabilize the microscope as you lift it.
Not Unplugging the Wires
Before you move the microscope, unplug all the wires. It includes the power cord and any other cables that might be connected to it.
It will prevent the wires from getting tangled or pulled out. It will also protect the microscope from any potential damage that could be caused if you accidentally lose your grip while trying to move a microscope that’s still plugged.
Not Removing the Wet Slide
You should not move a microscope if the wet slide is still in place. The moisture from the slide can damage the microscope and make it difficult to see through the lens.
The best way to remove a wet slide is to use a slide remover. If you don’t have one, you can use a piece of cloth or your fingers to slowly and carefully remove the slide.
Not Removing Camera Mounts
If you use camera mounts, you should remove them before moving the microscope. The mounts are delicate and can get damaged if mishandled.
Also, their weight can throw off the balance of the microscope, making it more difficult to carry.
What Happens if You Drop a Microscope?
If you accidentally drop your microscope, the first thing you should do is inspect the instrument for any damage. If there are no visible signs of damage, proceed with setting up the microscope as usual.
Check if the core parts, such as the stage, lenses, and light source, are still intact and functioning.
You should also check the following:
- Illuminator: Is the light source working? Try adjusting the light intensity to see if it works fine.
- Stage: Can the stage be moved up, down, and side to side?
- Condenser: Is the condenser in place?
- Objective Lenses: Do the lenses click into place? Are they clean? You should also prepare a slide and view it under the microscope to see if you get the same results as before. If you notice cracks or distortions, that’s a sign of concern.

But if everything appears to be in working order, congratulations. You likely just saved yourself a trip to the repair shop. However, if you notice damage to the condenser, objective lens, or any other optical part of the microscope, you first need to determine if they are interchangeable. If yes, you can replace the broken part. But if not, you’ll have to take your microscope to a professional for repairs.
Besides checking the microscope, it’s also essential to notify the authorities in the lab. For example, if you’re a student, tell your teacher what happened and ask if they can help you inspect the microscope.
It’s also a good idea to take pictures of the damages before you start using the microscope again. These pictures will come in handy if you need to file an insurance claim or report the incident to your school’s administration.
Final Thoughts
The proper way to carry a microscope is to hold its arm with one hand and keep your other hand under the base. Then, lift the microscope gently and take it to your destination.
When moving the microscope, always carry it horizontally. Do not tilt it up or down, as this can damage the lenses or other parts of the microscope. Keep it clean and use it gently, so you can use it for a long time.
Featured Image Credit: Krakenimages.com, Shutterstock
About the Author Jeff Weishaupt
Jeff is a tech professional by day, writer, and amateur photographer by night. He's had the privilege of leading software teams for startups to the Fortune 100 over the past two decades. He currently works in the data privacy space. Jeff's amateur photography interests started in 2008 when he got his first DSLR camera, the Canon Rebel. Since then, he's taken tens of thousands of photos. His favorite handheld camera these days is his Google Pixel 6 XL. He loves taking photos of nature and his kids. In 2016, he bought his first drone, the Mavic Pro. Taking photos from the air is an amazing perspective, and he loves to take his drone while traveling.
Related Articles:
Binocular Magnification Chart: Numbers & Distances Compared
What Is the Best Binocular Magnification for Hunting? Optical Features Explained
When Were Binoculars Invented? History, Today & Future
How to Clean a Refractor Telescope: Step-by-Step Guide
How to Clean a Telescope Eyepiece: Step-by-Step Guide
How to Clean a Rifle Scope: 8 Expert Tips
Monocular vs Telescope: Differences Explained (With Pictures)
What Is a Monocular Used For? 8 Common Functions