How to Sight in a Crossbow Scope for Beginners (2025 Guide)
Last Updated on

You just got your hands on a brand-new crossbow for hunting season. You’re ready to get out there and grab some game. Well, maybe you should sight your scope before you go in there. See, if your scope is accurate, you are going to miss your game 9 out of 10 times. No one has the time for that.
But you’ve never actually sighted in a crossbow scope before, or maybe you need a refresher on how to do it. This is a guide to how to sight in a crossbow scope for beginners, and it will follow all the steps you are going to need.

Gathering Supplies
No matter what before you start you are going to need the supplies to do it. Don’t worry, we have them listed below for ease.
- At least 3-5 arrows
- A target of some kind
- Crossbow with the scope already mounted
- The scope manual in case of troubleshooting
- Binoculars or spotting scope
- A crossbow rest or tripod
- A set of screwdrivers that fit your scopes needs
Once you have everything listed, you can head out to an open area where you can start working on the sight for your crossbow scope. Remember to have it in an open area where there are no animals, people, or houses that could get hurt while you are in this process.
How to Sight in Your Crossbow Scope
1. Target Setup

Before you do anything, set up your target. This can be on a tree, haybale, or even one of the targeting blocks. Do what makes the most sense to you and what you already have. The only way you are going to be able to do this is by having a target to shoot at.
Place your target 20 yards away from where you are going to be shooting. This is the distance it takes to start the calibration process for your scope.
2. Prepping Your Crossbow
Before you can start working on your scope, you have to prep your crossbow. This could mean making sure everything is set and ready to cocking it. Use your preferred method to cock your crossbow.
Once you have that set, you are going to want to set your first arrow into the flight rail. Get your crossbow ready on the tripod and then you are ready for your first test shot.
3. Shooting Your Crossbow

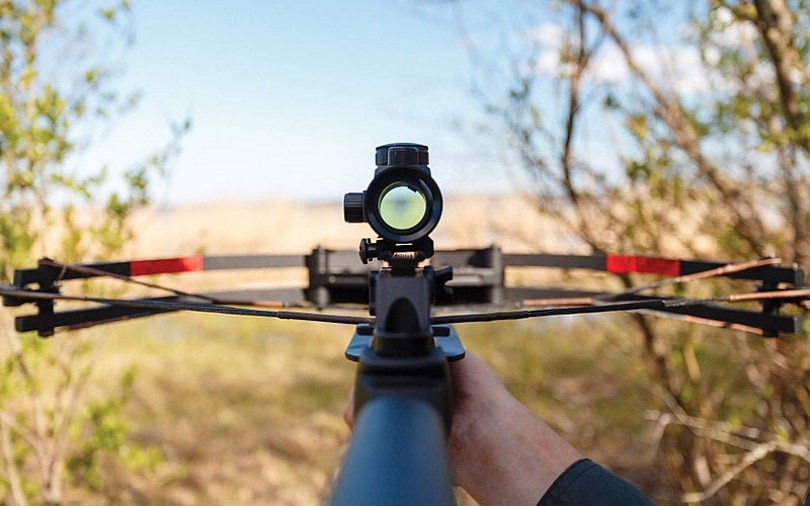
In most scope setups, you are going to have three different lines along with the crosshair. Each line is going to mean something different. The top most line is going to be the one you are going to use as it is the 20-yard line. As that is where you put your target.
The other lines from below the 20-yard line are the 30-yard line, 40-yard line, and then the 50-yard line. You are going to use those after you have your crossbow calibrated to what you need right now. Don’t worry about the other lines till you have completed the sight at 20 yards.
Using the dot or line that you have, you are going to line it up with the bullseye of your target. When you go to pull the trigger, remember to only use your fingertips. Don’t use your whole hand or arm, as that is going to change the accuracy of your shot.
Shoot at least three of your arrows.
4. Adjusting Your Scope
Once you have done your shot, you need to check to see how far off you are from the target. You will want to measure the arrow yourself or guess how far off it is using the binoculars. Then you are going to look at your scope. There should be knobs or screws to adjust the scope. These are typically known as windage and elevation knobs, but you may also have a hex adjustment screw. These knobs use a “click” sound to know the adjustment is happening.
As an example, if you are low 2 inches and 1 inch to the left, then you need to adjust your scope up 2 inches and to the right 1 inch.
Once you have done that, retrieve your arrows.
5. Shooting Again

After you have made your initial adjustments, shoot three arrows again. You are going to have to repeat step four until you are hitting the bullseye and have a decent grouping. Grouping is when your arrows are all in a decent cluster.
You are going to want a tight grouping. As soon as you have all that done then you are going to be ready to move on to the final step.
6. Maintaining Your Scope
After you’ve put in all the work to align your scope, it makes sense to keep it that way. Typically, your scope should stay aligned for the whole season, if not multiple seasons. However, before each season you are going to want to check your scope to make sure it is still aligned. To do so, you just follow the same steps from before.

Sighting in a Crossbow
Sighting in a crossbow is going to take some time. All that time is going to pay off in the long run, though. Having a sighted in crossbow scope is going to make your life easier and your hunt that much easier too. If you ever find yourself shooting off, go through the steps again, it is possible things have changed.
You might also be interested in some of our top-trending posts:
- Low-Glow vs No-Glow Trail Cameras: Which to Choose?
- How to Sight in a Thermal Scope: 6 Easy Steps
- Cooper’s Hawks vs Sharp-Shinned Hawks: What’s the Difference
Featured Image Credit: Crossbowproductions, Wikimedia
About the Author Robert Sparks
Robert’s obsession with all things optical started early in life, when his optician father would bring home prototypes for Robert to play with. Nowadays, Robert is dedicated to helping others find the right optics for their needs. His hobbies include astronomy, astrophysics, and model building. Originally from Newark, NJ, he resides in Santa Fe, New Mexico, where the nighttime skies are filled with glittering stars.
Related Articles:
How to Clean a Refractor Telescope: Step-by-Step Guide
How to Clean a Telescope Eyepiece: Step-by-Step Guide
How to Clean a Rifle Scope: 8 Expert Tips
Monocular vs Telescope: Differences Explained (With Pictures)
What Is a Monocular Used For? 8 Common Functions
How to Clean a Telescope Mirror: 8 Expert Tips
Brightfield vs Phase Contrast Microscopy: The Differences Explained
SkyCamHD Drone Review: Pros, Cons, FAQ, & Verdict
