Optics Mag is reader-supported. When you buy via links on our site, we may earn an affiliate commission at no cost to you. Read more.
How to Photograph the Moon: 6 Easy Tips & Tricks
Last Updated on
The moon is one of the most beautiful structures you can observe in the night sky. It’s the Earth’s natural satellite, and due to its various phases and different appearances, many of us want to capture its beauty in a photograph.
However, sometimes it can be really tricky to photograph the moon and get a good shot. Without the needed knowledge, your moon shot might look like a white dot in the sky—which is not so appealing.
Luckily, this article will provide you with helpful tips and tricks to help you turn your moon photography into art.
Why Is It Hard to Photograph the Moon?
The moon is extremely bright and as it’s surrounded by a dark sky, it can be hard to photograph. Most cameras, especially the ones on our phones, may find it hard to get the background bright enough and focus on a clear image of the moon.
As a result of regular photographs, the moon becomes overly exposed, looking like a white blob or a dot on a grainy background.
Another reason why it’s hard to photograph the moon is that it’s so far away from us, requiring you to have a good camera kit that can shoot at such distances. Most cameras are not well-equipped for this type of photography, resulting in blurry, unsatisfying moon shots.
The 6 Tips to Photograph the Moon:
1. Keep Track of Moon Phases
Image By: Klaus Stebani, Pixabay
The moon has several phases, and it looks different during the month, so you’ll need to figure out which phase you want to capture. You can try taking multiple photos in different phases to figure out what you like, although the full moon and the crescent typically look the best in photos.
If you’re a beginner, it might be best to shoot the full moon because it’s easier to get good exposure with high brightness. For more experienced photographers who want to get a stunning shot, we suggest trying to capture the waning crescent. Its shape looks beautiful in photos, but it’s harder to capture because there’s less light on the moon’s surface.
Once you decide on a phase that’s going to be in your photo, you need to look at a moon phase calendar to determine when that phase is going to occur. You can use various online websites to find this type of information.
2. Plan the Details
It’s best to photograph the moon when the sky is clear and there’s not a lot of pollution around you. That’s why, instead of shooting at a busy city, it might be better to head out to the country or somewhere where there are fewer street lights.
You should also consider the weather, and you should think about the details of the shot. Ask yourself some of these questions before making the final photography plan:
How do I want the moon to look?
Where do I envision it in the frame?
Which moon phase would I like to capture?
Do I want to photograph the moon when it’s rising or setting?
Although you can sometimes get lucky and get a good shot even without planning, it’s much better to have a detailed plan.
3. Consider the Setting
Image Credit: Piqsels
If you want to capture an excellent photo of the moon, it’s best to shoot it while it’s close to the horizon, when the moon is setting or rising. You should find out when the moon sets and rises in your area, which is something you can find online.
You also need to think about the weather, as the best shots require the sky to be clear, without clouds and other distractions. Try to look for places far away from city lights with low pollution, such as the mountains or the countryside. That will make your moon shot stand out from the crowd.
4. Use the Proper Equipment
One of the biggest advantages of taking a good moon photograph is proper equipment.
There are a few different things you’ll need:
A tripod: Using a tripod will allow you to have a stable base for your camera gear and lower the chances of taking a shaky shot. We suggest mounting your camera on a tripod to take a good moon photo.
A camera: The critical component of taking that perfect moon photo is using a good camera. While you can basically use any type of camera, it might be best to use a DSLR or a mirrorless camera. Using your phone won’t work well as phones don’t have adequate lenses and can’t zoom enough to give you a good shot.
Adequate lens: To get the best photograph of the moon, it’s best to have a high zooming lens, allowing you to get a closer shot.
Shutter release cable: Although this is not necessary, it’s a fantastic accessory when doing moon photography. It also prevents your camera from shaking, allowing you to take a better image.
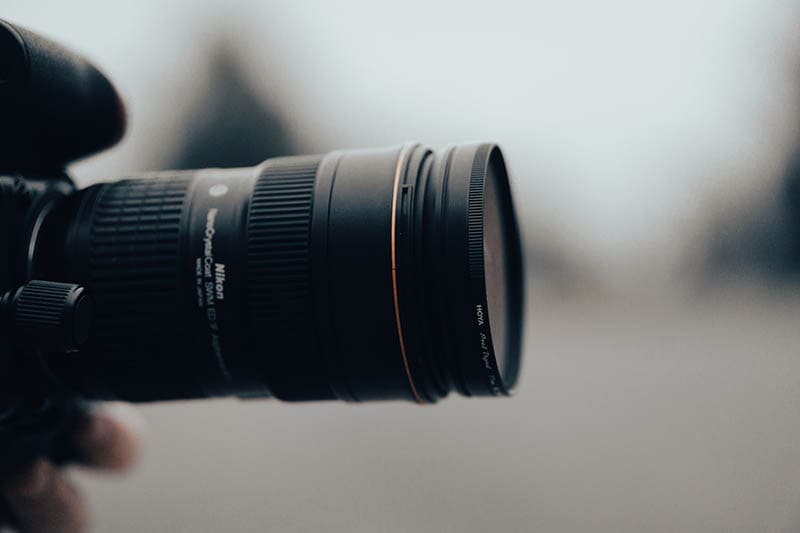
5. Choose the Right Lens
Image Credit: Adam Rhodes, Unsplash
The lens you’ll use also play an important role in getting a high-quality moon photo. If you choose smaller lenses, around 50mm, the moon in your photo will appear quite small; typically, as we see it from our viewpoint.
However, you can use a long 200mm or 300mm lens when you only want to capture the moon without having a background. These lenses are expensive, but you can find them for a reasonable price second-hand.
6. Exposure
There are no precise rules about exposure when photographing the moon, as the exposure requirements may vary. However, as the moon is already bright, it might be helpful to underexpose the photo to allow the moon’s details to shine through.
You’ll also need to adjust the ISO, aperture, and shutter speed to get the best possible control settings for the moon photo.
You can also turn on the bracketing on your camera to see which exposure works best for your needs. Bracketing allows your camera to take three different shots, one regular, one underexposed, and one overly exposed. By comparing them, you can see which option is what you’re looking for.
ISO
Cameras have developed over the years, and because of that, they commonly have a high ISO capability, which is beneficial when taking photos in the dark.
When taking a photo of the moon, you want to keep your ISO low, typically around 800 or lower, to get a clear, clean picture that won’t need a lot of editing.
Image Credit: Media Whale Stock, Shutterstock
Aperture
Most lenses allow you to adjust them to the so-called “sweet spot,” where the photograph is not too soft nor sharp. It’s typically at the middle aperture and will be the most convenient option for photographing the moon.
You should try to set your aperture between f/4 and f/8 to get the perfect moon picture. However, this may vary slightly depending on your lens and the photo type you want to make.
Shutter Speed
The shutter speed is there to capture the perfect moment as the moon moves in the night sky. You should go for a relatively slow shutter speed with your camera on a tripod, or your moon shots may appear blurry.
Final Thoughts
Photographing the moon is fun and exciting, but it takes planning and dedication to make that perfect shot you’ve envisioned. Remember to utilize all the tips and tricks from our article, and don’t be afraid to play with different settings and surroundings until you find what you’re looking for in a moon photograph.
Visnja is a creative, adaptable content writer that covers various topics such as DIY, pets, home improvement, travel, gardening, and more.
As a young mom and a college student, she didn’t have enough time to balance her personal and work life, so after multiple years of working a regular 9 to 5 job, she decided to pursue her passion and make a living out of it. She has been writing for a couple of years now, helping people to find valuable and interesting information online.