Optics Mag is reader-supported. When you buy via links on our site, we may earn an affiliate commission at no cost to you. Read more.
How to Collimate Your Telescope: 7 Easy Steps
Last Updated on
You got your brand-new telescope and you’re ready to head outside and look at the stars. When you get there, though, everything is fuzzy and Saturn’s rings look more like a teacup than rings. Your telescope is out of focus. No, you didn’t get a broke one, it just needs some adjusting.
Don’t freak out! It is a simple process, and it is called collimating. It isn’t a hard process to do, it just takes some time to get it right. Let’s look into what it is, though.
What is Collimating?
What the hell is this collimating thing? It sounds like a made-up word, doesn’t it? Well, it is a lot like doing routine maintenance on your car. It isn’t why you bought your car, but it is something that needs doing even if you don’t want to.
The idea is to align the mirrors in your telescope to get the clearest view possible. It takes some work, but often it can be done in less than thirty minutes once you get the hang of it. Most telescopes come with some sort of instructions on how to do this step, however, if you are brand new to this it can get confusing.
We created a step-by-step guide to help you get through your first collimating experience.
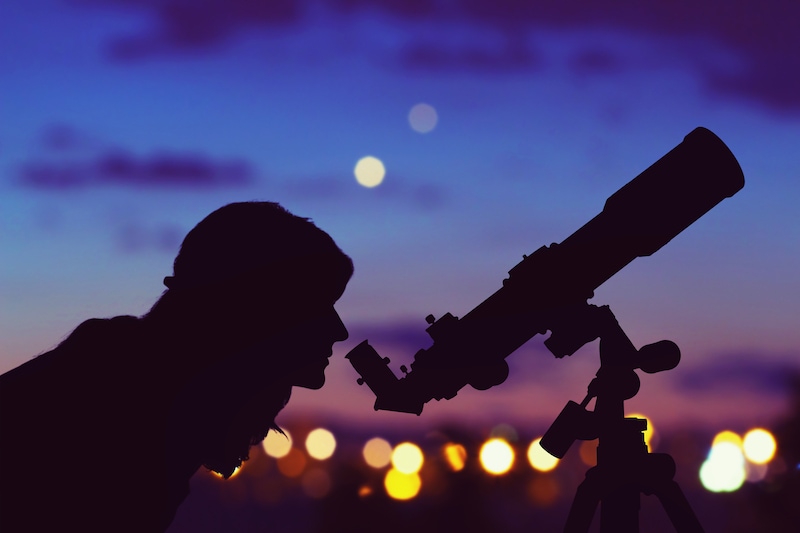
Photo Credit: AstroStar, Shutterstock
The Equipment Needed
For equipment to help you collimate your telescope, you will need a few things to get started.
Collimation Cap: Typically, your telescope is going to come with this cap or even slight tube. It is a plug that fits in your reflector’s focuses. There is a small central hole in the center of the cap. It is typically used to help align your secondary mirror to your focuser. However, it can also ensure there is a correct alignment between your secondary and primary mirrors.
Cheshire: This is not a mandatory tool to have, however many newcomers find this tool helpful. It adds a set of crosshairs to make alignment easier.
Laser Collimator: This device has its difficulties, but it is a useful tool to make this task faster. The laser sits in the focuses and shines a beam that ideally reflects onto the hole it came from. However, when it doesn’t, then that is when adjustments are made. If your telescope is so far out of collimation that the beam doesn’t hit the second mirror, it helps to point the laser at a wall to make the initial adjustments. Don’t worry, we’ll cover that in a few. Remember, though, not to look directly at the laser as it can harm your eyesight.
Star Test: Well, a star is pretty easy to see in the night sky and it is free to use. The downside to this is that there aren’t always great night skies to see the stars. If you get lucky and have a great night sky while collimating, then this is an easy method to use.
Screwdrivers or Allen Wrench: Depending on your model, you may have Phillip’s head screws or ones that need an Allen wrench. Look at your model to know which one is going to be needed unless you’ve already replaced the screws with knobs for easier focus.
The Collimation for a Reflector
You are free to use this image but we do require you to link back to Opticmag.com for credit
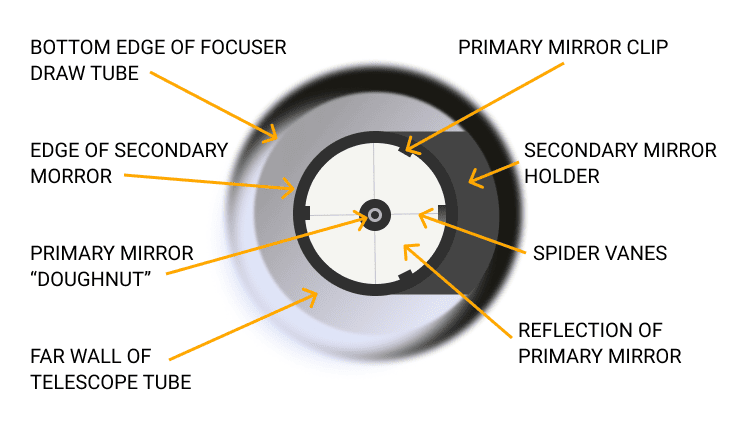
This is the very first step in starting collimation. Before you get started, you are going to want to mark the center of your primary mirror. The best way to do this is to use the white adhesive binder reinforcement rings you can get any office supply store. However, you could easily just use your collimation cap, which is what we will use for ease.You are going to put your collimation cap on the focuser and try to identify all the parts shown in the illustration.
This is what the perfect alignment is supposed to look like, and it is expected what you see is going to look different. Don’t worry about that though, you are going to fix it.
What you are going to do is insert the Cheshire where directed and inspect the position of the secondary mirror. The crosshairs are going to make it easier to see where the center is going to be. You are going to use the adjustment screws to do this. They are often covered by screw caps or knobs depending on your telescope. You should only have to do this step once.
Now it is time to use the laser collimator. To do this remove the Cheshire first. Now, insert the focuser and adjust the secondary mirror once again using the screws. You are going to want the beam of the laser to be where you marked your primary mirror’s center. Careful that when you are looking you, don’t let the beam hit your eye.
Now it is time to adjust the primary mirror. This is to ensure that the reflection is headed into the center of the focuser. On the back of the mirror cell, there are three adjustment screws but can be up to six and those are what you are going to use to adjust the mirror. Honestly, if you have a friend who can look while you adjust this makes this step easier. The goal is to get the beam to return to the place it is emitted from.
The Collimating of an SCT
The very first step is to make sure your mount is on and tracking. Now, insert an eyepiece that will give you moderate to high magnification. Once you have that set you are going to want to find a bright star or if you are using the laser you will want to find the laser dot.
Next, you want to defocus slightly until you see a doughnut of light. If the center hole is off center, then you know your mirrors are not in alignment. On most modern telescopes there is a plastic circle that is the secondary mirror’s mount. You’ll find three adjustment screws which may be covered by caps.
Adjust these screws slowly, one screw at a time, and make minor corrections. Monitor the hole and watch for it to get properly centered in the doughnut. This may take some time and some adjusting to get it perfect. Once it is centered, you now need to fine-tune your focus so you can see the diffraction rings.
Photo Credit: Jennifer Lim-Tamkican, Unsplash
An older SCT can suffer from mirror shift. This is when the primary mirror flips slightly to one side as the telescope crosses the meridian. For best results collimate on the side of the sky you are observing. You should only need to adjust the primary mirror in this case to bring it back into focus.
It is best to do the collimating of an SCT at night, as the tools for the day can get expensive.
Conclusion
You’ve done it! Now your telescope is ready to use and with time the process to get it collimated will go faster. You won’t have to make any major adjustments unless the whole thing gets shaken around. Most times, after your first adjustment, you only need minor ones. Hopefully this guide helped you make sense of technical language and you can enjoy the night sky.
Robert’s obsession with all things optical started early in life, when his optician father would bring home prototypes for Robert to play with. Nowadays, Robert is dedicated to helping others find the right optics for their needs. His hobbies include astronomy, astrophysics, and model building. Originally from Newark, NJ, he resides in Santa Fe, New Mexico, where the nighttime skies are filled with glittering stars.