10 Jewelry Photography Ideas to Get You Inspired
Last Updated on

Jewelry photography can be a difficult genre of photography to master for several reasons. First, your objects are often very small. So, it’s a challenge to figure out the right settings to produce clean, clear, and precise photos. It can also be difficult to come up with creative ways to make jewelry the focal point and prevent them from getting lost in the background.
If you’re a beginner or feeling stumped, it’s often helpful to go back to the basics to figure out how to get the best jewelry photos. Here are 10 ideas that you can look into to develop beautiful photos that you’d be proud to display.

The Top 10 Jewelry Photography Ideas to Get You Inspired
1. Use a Macro Lens

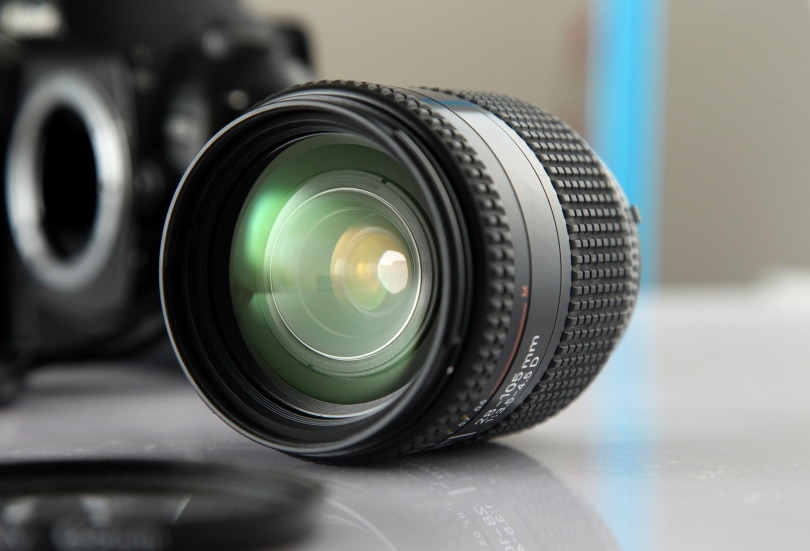
Using the correct lens is crucial to jewelry photography because most of your pieces are going to be small. Kit lenses won’t be able to zoom in on tiny stud earrings or thin chain necklaces. A macro lens will outperform these lenses in the context of close-up shots of jewelry.
Macro lenses with a focal length of at least 60 mm work well with jewelry photography. Just keep in mind that manual focus is usually the preferred and more effective way to produce clear photos. So, it’s best to anticipate that you’ll spend some time figuring out focus settings when using a new macro lens.
2. Use Plain Surface

Whether they’re minimalist accessories or loud statement pieces, most jewelry does well with a plain background. When you already have close-up shots of the intricate details found in jewelry, it’s often the case that less is more.
A plain white background or one with neutral tones can do wonders in helping a piece of jewelry pop and stand out on its own. You’ll also want to avoid using patterned and heavily textured backgrounds because they can compete with the contours and facets of certain types of jewelry, especially ones that use gemstones.
3. Use Natural Surface

Natural surfaces, such as wood, sand, and stone, can also make the jewelry stand out. After all, many types of jewelry contain gems that were once unpolished rocks.
If you want to use natural surfaces, try to look for ones that don’t have too many textures or patterns. Try to look for wood that doesn’t have too many rings and rocks that don’t have too many streaks on them. If you want to experiment with sand, choose a fine-grain variety with very few speckles.
4. Use Natural Light

While studio lights can create crystal clear photos, there’s something about natural light that produces beautiful colors in photos. Natural lighting can be finicky, and it’s unreliable because you’ll never be 100% certain about how much bright sunlight you’ll see each day.
So, if you’re blessed with a clear and sunny day, maximize the amount of sunlight you have by stationing your backdrop next to a large window. It’ll be helpful to start as early as possible so that you have an ample amount of consistent sunlight.
5. Play Around With Complementary Colors

If you’re up for a fun challenge, you can try playing around with the complementary colors of your jewelry. For example, use an orange backdrop for sapphire pieces or a purple against citrines.
If you have models, you can also style them in the complementary colors of your jewelry. When done correctly, complementary colors can help your jewelry pop and look more vibrant.
6. Use Clear Double-Sided Tape and Invisible String

Double-sided tape is a great tool for small pieces of jewelry, such as studs and rings. You can use it to help rings stand upright and produce photos that help people see a better view of their dimensions.
Invisible string, such as fishing lines, can help you create photos where jewelry looks suspended in midair. You can also use strings to make jewelry rest at different angles. Just make sure to be thorough when you’re editing so that you don’t leave any traces of tape or string.
7. Prevent Excessive Reflections

Part of the fun in jewelry photography is figuring out the right amount of reflection to keep in a photo. Lighting can help metal pieces shine and precious stones glitter. However, too much reflection is blinding and makes the jewelry look unflattering.
Take some time to play with exposure and camera levels. As a general rule of thumb, positioning your camera at a slightly higher angle can help reduce reflections while taking shots from a more flattering angle.
8. Invest in a Sturdy Tripod

A tripod is going to help immensely with producing clean and crisp photos. It’ll eliminate camera shaking and can also help you take steady photos at angles that would be difficult to achieve on your own.
Tripods will also help you take clearer photos with lower ISO settings because they’ll help keep your camera stable. This means that you can potentially set up a photo at ISO 100 to produce clear, high-quality photos.
9. Work With Models

Models are invaluable if you’re taking photos of jewelry for an online store. They will really help customers envision how they can wear certain pieces. Working with models does add an extra challenge because certain types of jewelry match well with certain looks. So, you’ll have to also figure out how to style your model.
If you’re feeling uncertain about styling a model, you can always do close-up shots. For example, you can just take photos of hands and arms with rings and bracelets on them.
10. Invest in Mannequin Parts

If you’re in a pinch and don’t have time to schedule with models, a mannequin bust or hands can help achieve a similar effect. Customers can get a better estimate of the size and look of the piece of jewelry if it’s hung on a mannequin.
You can also get creative and use multiple mannequin busts to showcase a set of jewelry in a more artistic manner. 
Conclusion
Jewelry photography does require some patience and experimentation. However, all the hard work feels so satisfying once you get the hang of developing clear, high-quality photos. Jewelry can be stunning focal pieces and are excellent objects to practice and expand your photography skills. It’ll teach you valuable lessons in working with lighting, angles, and manual focusing.
See also:
- How to Become a Travel Photographer
- How to Become a Real Estate Photographer
- 9 Abstract Photography Ideas to Get You Inspired
- How to Become a Wildlife Photographer
Featured Image Credit:
Table of Contents
About the Author Jessica Kim
Jessica is a freelance writer who spends most of her day researching and writing a number of topics. She loves sharing helpful information that people can use to better understand their pets, nature and the world around them. When she isn't writing, you may find her walking dogs, tending to her plant babies, or drinking her nth cup of coffee.
Related Articles:
How to Clean a Refractor Telescope: Step-by-Step Guide
How to Clean a Telescope Eyepiece: Step-by-Step Guide
How to Clean a Rifle Scope: 8 Expert Tips
Monocular vs Telescope: Differences Explained (With Pictures)
What Is a Monocular Used For? 8 Common Functions
How to Clean a Telescope Mirror: 8 Expert Tips
Brightfield vs Phase Contrast Microscopy: The Differences Explained
SkyCamHD Drone Review: Pros, Cons, FAQ, & Verdict
