
Optics Mag is reader-supported. When you buy via links on our site, we may earn an affiliate commission at no cost to you. Read more.
How to Take Photos Through a Telescope (2026 Guide)
Last Updated on

Examining the stars and other celestial entities is one of the most human endeavors you could undertake. We’ve been staring out at the cosmos as long as humans have been around. Even thousands of years ago we were observing the heavens, using them to guide our way and philosophizing about our place in all that expanse space.
Today, astronomy is more accessible than ever before. Anyone can get a decent telescope for a minor investment and use it to explore the stars and planets from the safety of your backyard. But we live in a culture of selfies and sharing, so many amateur astronomers are wanting to share their findings. Luckily, this is a simple process, and you can start taking photographs through your telescope with the equipment you already have.
Three Types of Telescope Photography
Though there are several different ways for you to take photographs through your telescope, they can all be grouped into three categories. Each category represents a different manner of shooting through a telescope, but all of them are viable methods of doing so.
Afocal
The easiest and cheapest method of telescope photography, you can probably perform afocal photography with the equipment you already own. This type of photography is when you simply hold a camera up to the eyepiece of your telescope and take a picture. You can use any type of camera for afocal photography, even your smartphone. Keeping everything steady can be a bit tricky, though we’ve got some tips to help you manage that.
Prime Focus
Prime focus photography is a bit more expensive and requires some specialized equipment, but nothing crazy. When doing prime focus photography, the telescope essentially acts as a massive and extremely powerful telephoto camera lens. This type of photography works best with powerful cameras that have removable lenses, such as DSLR and mirrorless cameras.
Eyepiece-Projection
Afocal and prime focus photography are great for getting shots of the cosmos, but if you want to get a close-up shot of the moon with enough detail to see individual craters, you’ll want to use the eyepiece-projection method. For this, you’ll need a special eyepiece that goes between the camera and the telescope, offering increased magnification for those close-up shots.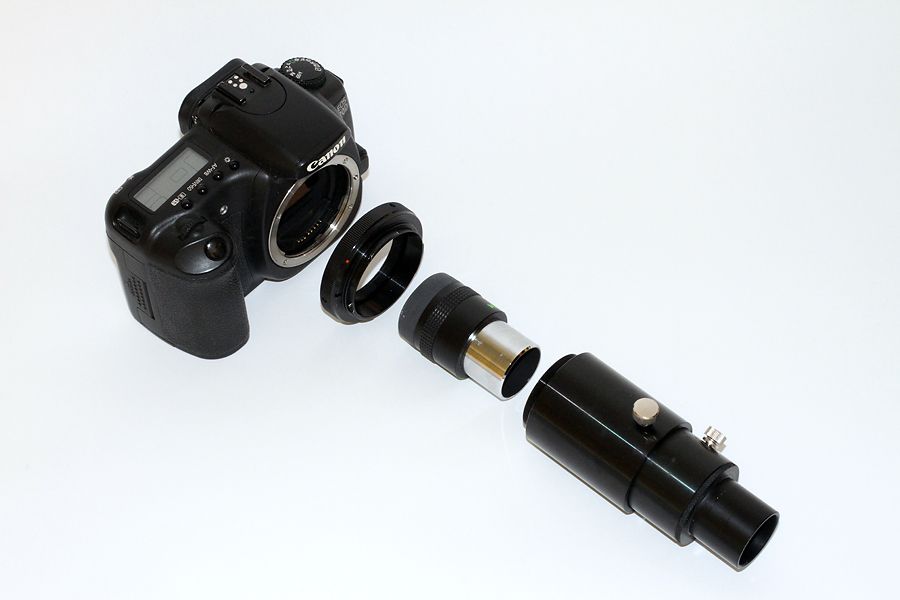
Taking Photos Through a Telescope: 7 Methods
Now that you understand the three main categories of telescope photography, let’s discuss the specific ways you can actually take photos with your telescope. Some of these methods use your smartphone, others require specialty cameras or high-end digital cameras. You might be able to perform some of these methods without the need for any additional equipment, but other methods will require special gear that could be quite expensive. No matter your goals and budget, one of these methods will be viable for you.
1. Hand-Held

This is an afocal photography method that anyone can do. All you need is a telescope and any type of camera. You can use a digital camera or the camera built into your smartphone — it doesn’t matter. No special equipment will be needed for this, but it’s also the least reliable method and will take longer to get a clean shot.
As the name suggests, for this method you’ll be simply holding your camera up to the lens of your telescope. What makes this difficult is keeping your camera steady enough for the picture to turn out sharp. Even the slightest movement can result in a blurry image.
To do this, set up your telescope and get it centered on whatever you want to take a picture of. Get everything perfectly focused so the image is sharp. Then, hold your smartphone or other camera so that the camera lens is directly against the eyepiece of the telescope. You should be able to see the image through your camera. Snap the picture, taking care not to move while pressing the button. It might take a few tries to get it just right.
2. Taped into Place

This method builds on the first one. Instead of holding the camera up, you can tape it to your telescope. Naturally, this will only work if you’re using a lightweight camera. Don’t try to tape your heavy DSLR camera to your telescope, it will throw off the balance and might topple everything over, possibly damaging your telescope and camera!
Another tip when using this method is to use clear tape or masking tape since they’re less likely to leave residue behind than something like duct tape.
Once you get the telescope focused on the image you want to capture, carefully tape your camera to the telescope so that the camera lens is against the eyepiece. You may need to readjust the telescope after to ensure it’s still centered on the image you want.
Now, take a picture. You won’t have to worry about hand shaking as much, though pushing the button to take a photo can still introduce movement. This can be avoided if you use a remote. Simple Bluetooth remotes that control your smartphone’s camera are cheap and easily available, though finding a remote for a digital camera could prove to be more difficult.
3. Tripod Mounted
While taping your camera to your telescope can reduce the amount of shake and create a sharper picture, it’s got some obvious drawbacks, such as the time it takes to tape your camera up and the residue it could leave behind. But you can get a similar effect more easily if you have a tripod available.
Mount your camera or smartphone onto your tripod. Point the telescope at the celestial body you wish to photograph and get it in focus. Then, position the tripod so that the camera is at the eyepiece of the telescope. Once again, you want the lens of the camera against the telescope’s eyepiece.
At this point, you’re ready to take a picture. A remote is still a great choice, ensuring no movement is introduced during the shot. Timers can also make good substitutes for a remote.
What’s nice about the tripod method is how quickly you can remove the camera and set up the telescope for a different shot. But not all tripods allow you to move the camera in such a way that it’s easy to line up with your telescope’s eyepiece. Keep this in mind when shopping for a tripod for telescope photography.
See also: Aluminum vs. Carbon Fiber Tripod: Which Is Better?
4. Camera Adapter

So far, most of these methods have been perfect for the budding astronomer who wants to share or document their space exploration. But what if you’re a photographer first who’s gotten into astronomy and wants to take professional-quality pictures of the cosmos? You need a method that will let you use your professional camera equipment, which is where a T-adapter and T-ring come in.
The T-ring and adapter will replace both your camera’s lenses and the telescope’s eyepiece, essentially turning your telescope into the lens of your high-end camera. This allows you to utilize the full power of your camera with the added magnification and clarity you’ll get from a telescope.
This method will only work on cameras with removable lenses. DSLRs and mirrorless cameras are perfect, but point-and-shoot cameras aren’t compatible. You’ll need just two items to make this work, provided you already have the camera. Those items are a T-ring and T-adapter. You’ll have to find the ones that will fit on your camera and telescope, which can make the process a bit confusing.
Once you find the right items, everything is pretty simple. Just attach them together, focus your image through the camera, then take your picture. Luckily, the two pieces you need are priced affordably, and it should only cost about $50 in total to get started. Again, that’s assuming you already have a compatible camera and telescope.
5. Cell Phone Adapter
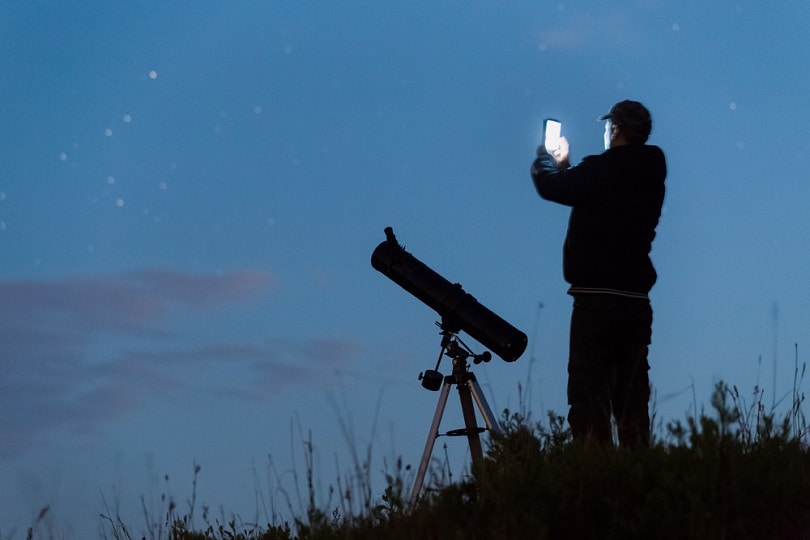
Cell phone adapters are affordable, easy to use, and accessible to just about everyone. Most of us have smartphones these days, and an adapter will enable you to use it for your telescope photography.
This adapter attaches directly to your telescope. Since most are universal, you shouldn’t have any issue getting it to fit with your telescope and your phone. Once it’s mounted to the telescope, simply slip your phone inside and the lens of your phone’s camera should line up with the eyepiece of the telescope.
Now, you can easily take photos with your phone through your telescope. The whole thing takes just a minute or two to set up, which means you can easily find several targets to photograph without spending all your time setting up the camera each time. For many people, this is probably the easiest and least frustrating method of telescope photography.
6. Telescope Camera
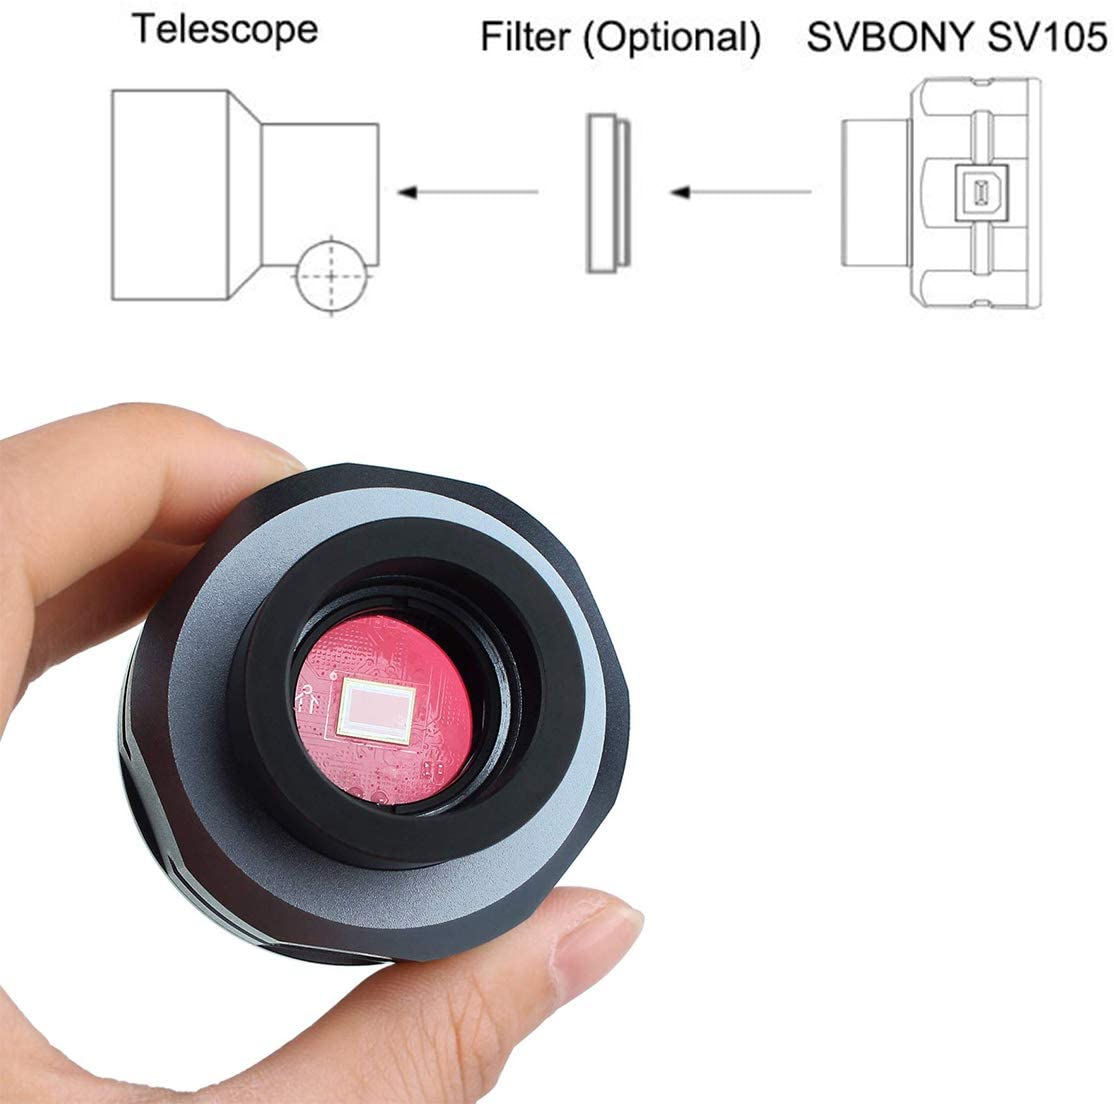
If astronomy is your primary focus but you want to take professional-quality pictures of the cosmos without having to complete a college course on photography, then a telescope camera might be the tool for you. These cameras are purpose-built for taking pictures and videos through telescopes. As such, they come with adapters for attaching them to all common telescope sizes.
Telescope cameras are high-powered and are perfect for taking pictures of the night sky. With other cameras, you might need to become an expert in settings if you want to take great pictures at night. It’s a difficult subject to master. But telescope cameras make it easy since they’re built to take pictures of it and are built with sensors perfect for the job.
The downside of telescope cameras is that they’re a pretty hefty investment. They’re also not great for other types of photography, so it’s a tool you’ll use for just one thing. But they provide incredible convenience. Just hook a USB cable from the camera to your computer and you can take premium-quality photos and videos on a large screen that lets you really see what you’re doing.
7. Eyepiece-Projection

This type of photography isn’t applicable for shooting all celestial subjects. It’s mostly used for close-up lunar shots, but it’s still worth mentioning. Compared to other types of telescope photography, eyepiece-projection is pretty expensive. You need a high-end camera with a removable lens like a DSLR or mirrorless. Plus, you need a T-ring, T-adapter, and a special eyepiece that goes between the camera and telescope, offering increased magnification.
Once everything is set up, you’ll focus the telescope while looking at the image through the camera. Using this method, you can get incredibly detailed close-ups of the moon’s surface, but you’ll need to understand how to tweak your camera’s settings to get it right.
Conclusion
In the modern world, we like to share everything we do. Why should our astronomy journey be any different? After all, the beautiful sights you find while exploring the cosmos through your telescope are far more interesting and informative than that picture of a plate of food you were considering uploading earlier. Now, you know how to easily take photos of the incredible sights you witness through your telescope, allowing you to share that beauty with others. Hopefully, it will spark an interest and love for astronomy in someone else.
Featured Image Credit: abriendomundo, Shutterstock
About the Author Robert Sparks
Robert’s obsession with all things optical started early in life, when his optician father would bring home prototypes for Robert to play with. Nowadays, Robert is dedicated to helping others find the right optics for their needs. His hobbies include astronomy, astrophysics, and model building. Originally from Newark, NJ, he resides in Santa Fe, New Mexico, where the nighttime skies are filled with glittering stars.
Related Articles:
How to Clean a Refractor Telescope: Step-by-Step Guide
How to Clean a Telescope Eyepiece: Step-by-Step Guide
How to Clean a Rifle Scope: 8 Expert Tips
Monocular vs Telescope: Differences Explained (With Pictures)
What Is a Monocular Used For? 8 Common Functions
How to Clean a Telescope Mirror: 8 Expert Tips
Brightfield vs Phase Contrast Microscopy: The Differences Explained
SkyCamHD Drone Review: Pros, Cons, FAQ, & Verdict