
Optics Mag is reader-supported. When you buy via links on our site, we may earn an affiliate commission at no cost to you. Read more.
How To Adjust a Rifle Scope: Beginner’s Guide
Last Updated on
So, you’ve just picked up your shiny new rifle scope (and probably paid more than you wanted to for it) and now you’re not sure how to transform it from an expensive paperweight to a powerful tool that can increase the distance you can shoot accurately.
You may have had someone mount the scope for you, it may have been pre-mounted on the rifle you purchased, you may have mounted it yourself already, or you may be staring disconsolately at it on the table trying to figure out how it all goes together. If you haven’t mounted the scope yet, we recommend you follow a guide on mounting rifle scope before you go through all the adjustments.
For the purpose of this guide, we’re going to assume that your scope has been mounted on your rifle but you have not yet sighted the scope in.

Timing Is Everything
There are between six and nine ways that a rifle scope can be adjusted depending on the scope you have, and while that may sound like a lot, certain adjustments only need to happen once and others are intuitive and easy to understand. We’ll be going over a lot of terms, but rather than define them all upfront, we’ll clarify their meaning as we go.
Why Adjust a Rifle Scope?
Rifle scopes will not accurately predict where the point of impact of the bullet will be immediately out-of-the-box. Even if you mount it perfectly straight so that there is no difference between where the barrel is pointing and where the bullet is pointing, the bullet’s trajectory is not a straight line, so depending on where the bullet hits, it may appear lower or higher than what you’re expecting.
All of the ways to adjust a rifle scope increase your chances of being able to accurately predict where your bullet is going to hit.
When you buy a new scope, the adjustments you can make on it can be broken up into three distinct phases: adjustments while mounting the scope, adjustments while zeroing the scope, and adjustments that are made on an ongoing basis as you go shooting.
Adjustments to Make While Mounting
Since we’re assuming that the base, the rings, and the scope are all mounted to the rifle, you may need to loosen some screws to make these adjustments.
Adjusting the Scope Up & Down
Getting the scope to the exact right height for your eye can be a tricky proposition. Your goal here is to set the scope at a level where you can rest your cheek in the position you are comfortable shooting in and have the ocular lens (the lens on the end of the scope that you look into) positioned correctly in front of your eye.
If you have to adjust out of a comfortable or repeatable position to see into your scope, you won’t be very precise in your shooting. When shooting, “precision” refers to being able to hit the same point consistently or get a good grouping. This is as opposed to “accuracy” which just means hitting what you’re trying to hit.
To adjust the scope up or down, you have a few options. You can buy replacement mounting rings that are either taller or shorter. Or in cases where the scope is too high, you also have the option of buying a cheek rest or duct-taping a washcloth to your rifle stock to get your cheek higher. The important thing is that you get your eye where you need it to be every single time.
When your scope is at the right height so that you can see into it properly, this means your eye is in the “eye box” of the scope. The more forgiving the eye box of a scope is, the quicker and easier it is to get your eye in it while shooting comfortably.
There’s not a way to adjust the scope left and right unless you are specifically buying an off-axis scope mount. If your scope is to one side of your eye when you are comfortable, your stance is most likely the problem.
Adjusting the Scope Forward & Back
While adjusting the scope up and down brings your eye into the eye box, adjusting the scope forward and back brings your eye to the “eye relief” of the scope. Every scope with magnification has a certain eye relief, and only at that specific distance from the scope will you be able to see the entire image within the scope.
Eye relief is possibly the most frustrating aspect of learning to shoot with a rifle scope. It’s difficult to hold still well enough to keep your eye in the exact right spot and the image becomes useless quickly if you get too close or not close enough.
To adjust the scope forward and back, the easiest is when you have enough room on the main tube to just loosen the rings and scoot the scope forward or back. When doing this, you want to make 100% sure you don’t tighten the rings down on the ends of the scope where it starts to bulge outward because that can quickly break it.
If you’ve maxed out your ability to scoot the scope and it’s still not far enough in the direction it needs to go, the next best option is to loosen the rings where they attach to the rail and move them in the direction they need to go. If you need to move the scope further back and you already have the rings as far back as they can go, then you may need to purchase a cantilever mount to get you a little further.
If you don’t know what the eye relief on your scope is then you should be able to quickly search online for the scope you have and find that information on the product listing or on the manufacturer’s website, and it will usually be between 3 and 4.5 inches.
If by chance you are reading this before buying a scope, then make sure you don’t accidentally buy a scout scope for a standard rifle, or a standard scope for a scout rifle. Scout rifles have the scopes mounted much more forward and usually have around 9 inches of eye relief, which makes them unusable on a normal rifle.
Leveling the Scope

If your scope isn’t level you will run into a host of issues. First, anytime you adjust for windage or elevation, the adjustments won’t go straight up-and-down or left-and-right; they’ll be at an angle. This is particularly frustrating when the scope is close enough to level that you can’t tell it’s off just by looking at it.
You will not be accurate if your scope has a cant to it. Also, if your reticle has a BDC ladder, hash marks, or a rangefinder, those features will not help as you are trying to adjust for bullet drop and wind holds using the reticle. The one nice thing about a scope not being level is that it usually becomes obvious quickly after you start shooting at longer distances.
You can use a bubble level to help you get it right, or you can use a leveler kit (or any flat object of the right width) to place between the flat spot underneath the turret adjustments and the rail. To level a scope properly, you have to confirm that the rifle itself is perfectly upright and level as well. Once the rifle is level, that’s when you can insert the leveling kit and get the scope perfectly aligned as well.
Leveling a scope is not particularly complicated, but it is a critical step to take and should not be estimated just by looking at it.
Focusing the Eyepiece
Once your scope is the right height for your shooting position, and you’ve adjusted it forwards and back to put your eye at the eye relief of the scope, and it’s level, the next step is to focus the eyepiece. Focusing the eyepiece is something that really should only need to be done once each time a new shooter is using the scope.
The eyepiece focus determines how sharp or blurry the reticle appears, and it’s adjusted by turning the housing around the ocular lens (this assembly is collectively known as the eyepiece). The easy way to focus the eyepiece is just to crank it all the way to one end, which should make the reticle obviously blurry.
Then you slowly turn it the other way while in your shooting position until it stops getting sharper and starts getting blurrier. Then start turning it back the other way and continue going back and forth making more minute adjustments each time. This process will be sufficient for the vast majority of shooters.
Finishing Mounting

Those are the four ways a scope can be adjusted during the mounting process, so once you’re done with those you can get your rifle ready and take it to the range to be sighted in.
Adjustments to Make While Zeroing
Another way of saying “sight in” is “zero in” your scope. Zeroing in your scope is the process of adjusting the reticle so that the center lines up exactly with where the bullets are actually hitting. Because a bullet does not travel in a perfectly straight line but in a slight arc, you can only zero your scope in at one specific distance at any given time.
There are two main adjustments you use to zero your scope, and everything you do while sighting in may also need to be adjusted each time you shoot.
This guide isn’t specifically about how to sight in your scope, so if you’re not sure what the basic process is, I’d recommend you read up on . Once you’ve gotten to the point where you’re hitting paper at 100 yards, whether you use a laser bore sight or another method, that’s where the main adjustments that we’ll talk about start to come into play.
Making Elevation Adjustments
The elevation adjustment knob is on the top of the scope, and it will adjust the reticle either up or down based on which way you turn it. If your shots are hitting below the center of your reticle, then you need to lower the reticle to meet the shots. If your shots are hitting high, then your reticle needs to adjust upward until they match.
Adjustments on elevation and windage are usually measured in MOA, although they may be in Mil depending on the scope you buy. These are easy enough to understand. One MOA is equal to 1 inch of left-right or up-down travel at 100 yards. So, if your scope is a 0.25 or ¼ MOA (like most scopes are) that means each click will adjust the reticle 0.25 inches in the given direction at 100 yards, 0.5 inches at 200 yards, etc.
If the adjustments are in Mil, they are likely 0.1 Mil, which is equal to 0.36 inches at 100 yards.
To adjust for elevation, you can turn the turret either clockwise or counterclockwise. Turning the knob clockwise will raise the reticle up to meet the points of impact, and turning the knob counterclockwise will lower the reticle down to meet the points of impact. This can be tricky to remember and may be counterintuitive if you don’t remember that it’s the reticle that is moving to meet where the bullets are hitting.

Making Windage Adjustments
The windage turret adjustment is on the right side of the rifle and functions similarly to the elevation adjustment with the same amount of change with each click. While elevation is something that is often adjusted while shooting to compensate for different distances (or actual elevation), most shooters don’t use the windage adjustment much to actually compensate for wind.
The reason is simply that the wind is inconsistent. Often by the time you’ve adjusted for a certain wind speed, it has already changed and you just have to adjust it again. Most shooters will simply feel the wind and develop a sense over time of how much the wind will affect their shot based on how it feels.
Wind adjustments are done by turning the knob either forward or back towards you. Turning the knob forward moves the reticle to the right and turning it backward moves the reticle to the left. So, if your shots are hitting to the right of the reticle, you would need to turn your windage turret forwards. If your shots are hitting to the left, you need to turn the turret back towards you.
Resetting the Turrets to Zero
Some scopes offer this functionality while others don’t. The more you paid for your scope, the more likely it has resettable turrets. This is a really nice feature because once your scope is “zeroed” it would be nice if the turrets were at “zero” as well. This way when you have to adjust for a specific shot, you don’t have to keep track of how many clicks you did with each knob, you can just go right back to “0” on the dial.
Fair warning, once you have a scope with resettable turrets, you’ll never go back.

Adjustments to Make While Shooting
Elevation and windage adjustments may need to be made while you shoot, but since we’ve already gone over those we’ll jump to the adjustments that (for the most part) only happen while shooting.
Adjusting Parallax
You may have adjusted for parallax while you were zeroing in your scope, but even if you did you’ll want to adjust parallax each time you switch shooting distances.
Parallax is how objects at different distances seem to move at different speeds. You experience and use parallax to your advantage all day every day. If you put your hand out and close one eye, your hand will be blocking something from view. If you want to see that something, you don’t have to move your hand; you can just move your eye. This is referred to as parallax.
In a rifle scope, the reticle would be your hand and the target area would be the something it was blocking. If you move your eye, the reticle would no longer block the same portion of the target area. This is important to compensate for because it will throw off your shot unless your eye is in the exact, identical spot every single time you line up your sight picture.
Since no one is perfect, a lot of accuracy and precision errors come from parallax. A lot of scopes, especially low-power and budget scopes, do not have parallax adjustment, but it’s becoming more common. If your scope doesn’t have adjustable parallax, chances are that it’s fixed at 100 yards, which means there will be no parallax when you’re aiming at a target at 100 yards.
Parallax will get worse the further away you get from where it’s set at, so if you’re able to adjust the parallax of the reticle, then you can eliminate it at whatever distance you’re shooting.
The adjustment may be a side knob on the left side by the elevation and windage turrets, or it may be via an adjustable objective. The objective is the end of the scope that you see out of, and an adjustable objective allows you to turn it to adjust the parallax of the reticle.
Either way, there should be distance markers on the dial that show you what it’s being set to. You can double-check after you get it close by looking through the eyepiece and moving your head while staying in the eye box. If the reticle doesn’t move in perfect concert with the target area, then the parallax is not perfectly set, and you can make minute changes to get it where it needs to be.
Adjusting Magnification
This is pretty straightforward, and let’s be honest: it was probably the first thing you did after you opened your scope. Adjusting the magnification is done right above the eyepiece and you simply turn the dial to the magnification that you want.
Some magnification rings have a throw lever to help get you where you want faster and easier, and some have a fiber optic indicator to make it easy to see what magnification you’re at.
This is another thing you may have done while sighting your scope in, but will obviously need to be done as you shoot at different distances.
Illuminated Reticle Brightness
If your scope has an illuminated reticle, then it most likely has different brightness settings that you can cycle through. You may be able to switch between red and green colors, daylight and night vision settings, or just how bright the reticle is. The most common places to see the brightness adjuster are the left side in place of (or on top of) the parallax adjustment, or on the eyepiece behind the zoom ring.
Final Thoughts
Knowing all the ways you can adjust a rifle scope will give you access to all the power and versatility it has to offer. Even an incredible tool is useless if you don’t know how to use it. The best thing you can do for your shooting is to practice and learn as much about your equipment as you can.
Once you know how scopes can be adjusted and understand how they work, it’s not complicated to adjust them to be exactly what you need them to be.
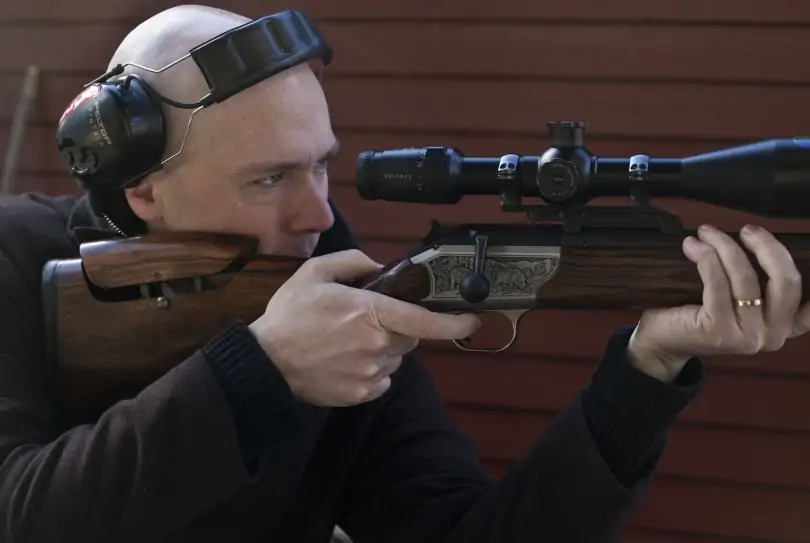
Featured Image Credit: Piqsels
About the Author Robert Sparks
Robert’s obsession with all things optical started early in life, when his optician father would bring home prototypes for Robert to play with. Nowadays, Robert is dedicated to helping others find the right optics for their needs. His hobbies include astronomy, astrophysics, and model building. Originally from Newark, NJ, he resides in Santa Fe, New Mexico, where the nighttime skies are filled with glittering stars.
Related Articles:
How to Collimate Binoculars: 9 Expert Tips
How to Clean a Refractor Telescope: Step-by-Step Guide
How to Clean a Telescope Eyepiece: Step-by-Step Guide
How to Clean a Rifle Scope: 8 Expert Tips
Can You Use Binoculars to Look At Stars? How to Choose the Right Pair
How to Choose Binoculars for Bird Watching: 10 Expert Tips
Monocular vs Telescope: Differences Explained (With Pictures)
What Is a Monocular Used For? 8 Common Functions