How to Clean a Hummingbird Feeder in 8 Easy Steps (With Pictures)
Last Updated on

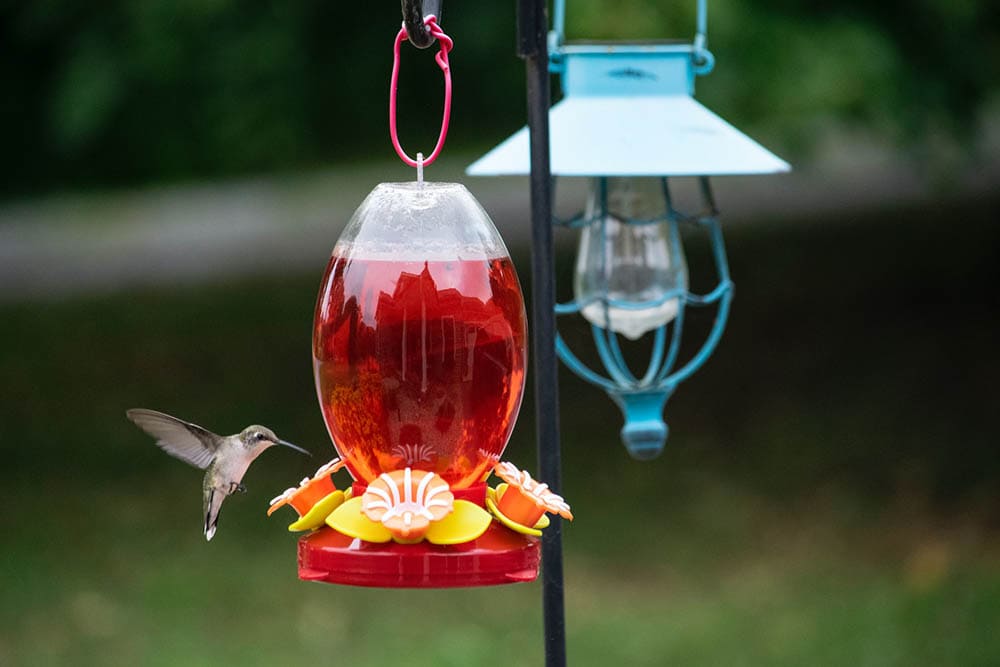
Hummingbirds are colorful visitors people love watching during summer. They are also an important part of nature thanks to their wonderful pollinating abilities. To help these astonishing creatures along their journey, many of us have opted to place hummingbird feeders around our patios and yards. These feeders offer hummingbirds tasty nectar and ensure they are well cared for. Hummingbird feeders do get dirty, though. With all the pollen, potential mold, and even dried-up nectar that can infest your feeder, giving it a routine cleaning every few weeks is necessary.
In this guide, we’ll give you eight easy steps to keep your hummingbird feeder looking its best. By following these directions, you’ll leave your hummingbirds happier and healthier this summer.

The 8 Steps to Clean a Hummingbird Feeder:
Before you tackle the job of cleaning your hummingbird feeder, you must gather all the necessary tools and materials. Having everything at your side while you work will not only make things easier, but it will help you save time and energy. Here’s a list of things you’ll need to take on this job.
- Bottlebrush
- Small bristle brush
- Soft sponge
- Microfiber cloth or paper towels
- Dish soap
- Hummingbird nectar
Once all these items are gathered and you have a clean workspace, you can begin.
1. Disassemble Your Feeder
Using as much care as possible, take the parts off your feeder. You will be removing insect guards, ant moats, perches, the base, and any other parts that appear as if they can be removed. If the base cannot be removed, simply soak it in warm water for 10 to 15 minutes until the crystallized nectar is gone. Do not force any parts off, however. Separating parts from your feeder that should not be removed can damage it and make it unusable.

2. Remove the Old Nectar
Once the base is separated from the reservoir, simply pour out the old nectar inside. If you aren’t near a sink, the nectar can be poured outdoors but avoid using areas near your home or patio as it may attract insects.
3. Clean the Reservoir
Next, it is time to clean the reservoir. This should be done using dish soap and warm water. The inside of the reservoir is quite difficult to reach. For this area, your bottlebrush is ideal. Simply use until all old nectar, dirt, and mold are removed. The soft sponge can be used to clean the outside of the reservoir and leave it looking its best.

4. Clean the Feeding Ports
Using the small bristle brush, or a pipe cleaner if that is all you have on hand, begin cleaning the feeding ports. When doing this, you should clean both the inside and outside of the ports. This is to ensure no nectar or mold is built up.
5. Rinse Thoroughly
Now that all parts have been cleaned, all soap residue must be thoroughly rinsed with clean water. This step is crucial and must be done to each piece of the feeder to ensure no soap residue is left behind when the nectar is added.
6. Dry
Using paper towels or the microfiber towel, dry all parts of the feeder. If there are parts you can reach, simply leave the feeder in a dish drainer for a few hours to dry at room temperature. Having all excess water removed keeps the nectar from being diluted when you refill your feeder.

7. Reassemble and Check Your Feeder
Once your feeder is dry, it’s time to reassemble all parts. During this process, you should check for snug connections to help avoid feeder leaks. If you notice any parts are damaged or showing signs of wear and tear, now is the time to replace them.
8. Fill, Hang, and Enjoy
When your feeder is reassembled and all parts have been checked, it’s time to refill your feeder. Use fresh nectar and watch for any signs of leaks. If things are looking good, hang your feeder and enjoy the visits from your local hummingbirds.


Conclusion
As you can see, cleaning your hummingbird feeder following this step-by-step guide is both fast and easy. When you see any unwanted build-up or mold on your feeder, don’t hesitate. Following these directions can quickly get rid of any grime and leave your hummingbird visitors with fresh, clean nectar once again.
Featured Image Credit: Katie Bernotsky, Unsplash
About the Author Robert Sparks
Robert’s obsession with all things optical started early in life, when his optician father would bring home prototypes for Robert to play with. Nowadays, Robert is dedicated to helping others find the right optics for their needs. His hobbies include astronomy, astrophysics, and model building. Originally from Newark, NJ, he resides in Santa Fe, New Mexico, where the nighttime skies are filled with glittering stars.
Related Articles:
How to Clean a Refractor Telescope: Step-by-Step Guide
How to Clean a Telescope Eyepiece: Step-by-Step Guide
How to Clean a Rifle Scope: 8 Expert Tips
Monocular vs Telescope: Differences Explained (With Pictures)
10 Types of Hummingbirds in Arkansas (With Pictures)
8 Types of Hummingbirds in Nebraska (With Pictures)
5 Types of Hummingbirds in Idaho (With Pictures)
3 Types of Hummingbirds in Mississippi (With Pictures)
