
Optics Mag is reader-supported. When you buy via links on our site, we may earn an affiliate commission at no cost to you. Read more.
20 DIY Pinhole Cameras You Can Build Today (With Pictures)
Last Updated on

There’s something both nostalgic and satisfyingly tangible about gripping a physical photograph between your fingers. And if you’re a photography enthusiast, you’ll enjoy it, even more, knowing that the photo was taken using a camera that you built yourself, from scratch.
Aside from cherishing the photo in a scrapbook or sticking it to your refrigerator, building a pinhole camera will help demonstrate the principles of photography and the physics of light. It’s also the perfect opportunity to help children learn, and see in practice, how cameras work.
There are almost endless ways in which you can build your pinhole camera, though the principles never change. Whether you’re looking to build an instant pinhole camera, a shoebox camera, or even a foldable pinhole camera, we have the plans for you.

20 DIY Pinhole Camera Plans
1. Instant Pinhole Camera by Lomography
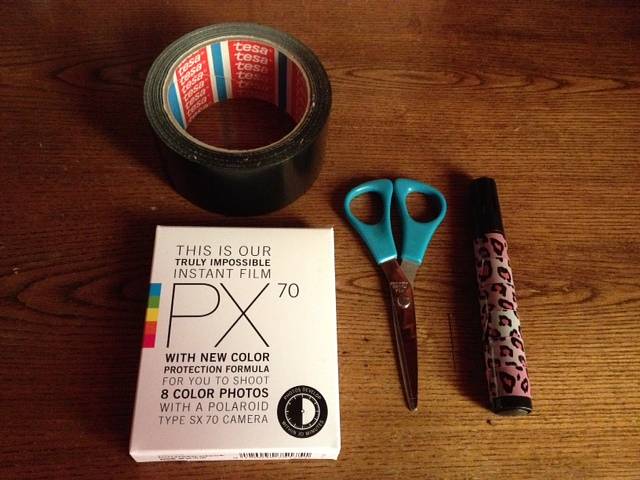
| Materials: | A box of Polaroid film (or Impossible PX 70), a piece of aluminum cut from an empty soda can, black electrical tape |
| Tools: | Scissors, a pin, a marker |
| Difficulty Level: | Easy |
If you’re looking for a quick and easy pinhole camera, then this is the plan for you.
With just a few simple household materials and tools, and a pack of instant film, you can put this pinhole camera together in just a few minutes.
After you’ve taken your photo, remember to cover the hole to stop your film from getting over-exposed. When you’re in a dark room, you can take the instant film out of the box and begin the development process, which is easy to do with instant film.
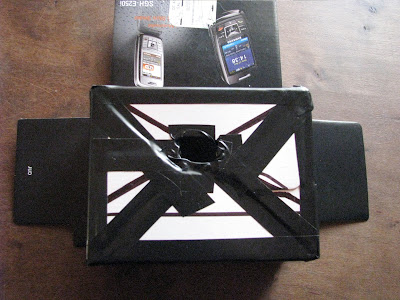
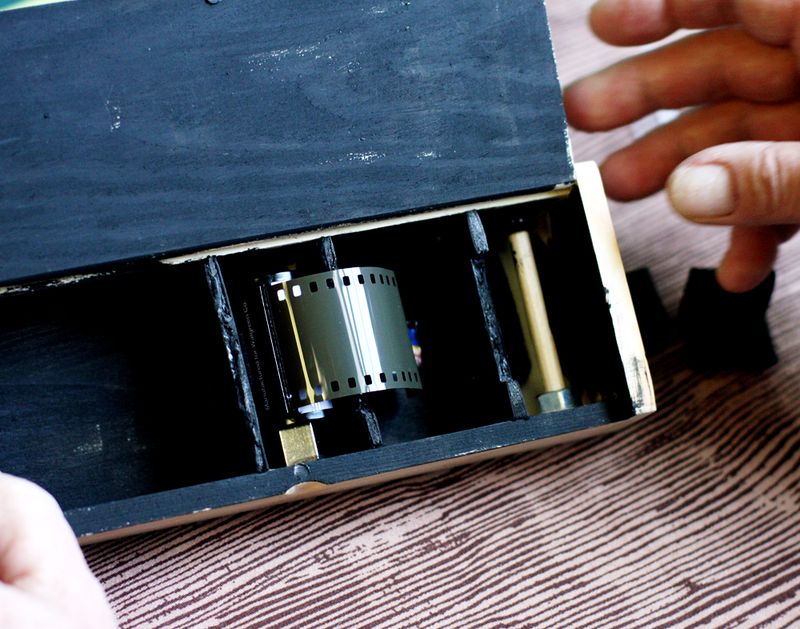
2. Dual Filmed Pinhole Camera by Lomography
| Materials: | A 120mm film box, 2 new rolls of 35mm film, 2 empty 35mm film canisters, aluminum foil, black tape, black card, wooden popsicle stick |
| Tools: | Needle, pen or pencil, black marker, ruler, scissors, craft knife |
| Difficulty Level: | Moderate |
Perhaps you’d like to experiment with your pinhole camera. This plan for a dual-filmed pinhole camera might be what you’re looking for. One photo burned onto a film cell is great, but this camera will burn the same image split across two films.
3. Paint Can Pinhole Camera by Lomography

| Materials: | Empty paint can, black spray paint, nail, aluminum foil, needle, fine sandpaper, black electrical tape, sandpaper |
| Tools: | Nail, needle |
| Difficulty Level: | Easy |
Pinhole cameras don’t have to come in rectangular boxes. This plan is for a cylindrical aluminum paint can pinhole camera that not only looks great but also produces very large 7×10 inch negatives.
The cylindrical shape of this camera will give your photos a barrel distortion. Building this camera will provide you with endless hours of experimentation with long exposure and an infinite depth of field.
4. Pinhole Camera for Black & White Photos by Instructables

| Materials: | A cereal box, a small piece of aluminum foil, black tape, and black and white photographic paper |
| Tools: | Needle, sandpaper, craft knife |
| Difficulty Level: | Easy |
This plan demonstrates the pinhole camera in its simplest form. Use a shoebox, a cereal box, or any other large cardboard box, and with a few simple steps, you can produce your very own pinhole camera.
Load it with black and white photographic paper, and your shots will have a vintage and timeless quality that suits the technology perfectly.
5. Homemade 35mm Box Camera by Instructables

| Materials: | 1/2” Plywood, wood screws, black masking tape, a small piece of Neoprene, a thin sheet of plastic, a broken SLR camera and Lens for parts, or a lens |
| Tools: | Table saw, powered miter box, fine-tooth hand saw, router, drill and countersink bit, coping saw, hack saw, razor knife, scissors, screwdriver, and dremel tool |
| Difficulty Level: | Hard |
Looking to take your pinhole camera to the next level? This plan will guide you through creating your own working 25mm box camera. This is a good project for those who enjoy woodworking and tinkering.
Complete with a lens, a wooden box, and a shutter, not only does this camera look impressive, but it can also take some amazing shots.
6. Design and Build Your Own Pinhole Camera by Instructables

| Difficulty Level: | Hard |
This plan will tell you everything you need to know in order to design and build your pinhole camera from scratch. Aimed at avid woodworkers, the final product will look professional, and take very high-quality photographs.
7. Build an Anamorphic Pinhole Camera by Instructables

| Materials: | Poplar board, wood dowel, aluminum sheet, acrylic tube, aluminum rod, retaining ring, washers, screws, nuts, felt, craft foam, shaft knob, glues, black spray paint, stain, spar urethane, sandpaper, film spools, film paper |
| Tools: | Laser cutter, drill press, sheet metal cutting tools, 4-40 tap, other common tools |
| Difficulty Level: | Hard |
This extensive plan is not for a one-day project, but rather a labor of love that may take a few days or even weeks to complete. It’s recommended for those who are proficient in woodworking, as precision cutting is required for creating finger joints and intricate parts.
The final product looks like a professional, antique piece of equipment, and being able to take anamorphic (stretched) photographs can be very fun.
8. Shoebox Camera by Instructables

| Materials: | Shoebox, black tape, black paint, aluminum foil, photographic paper |
| Tools: | Needle, scissors |
| Difficulty Level: | Easy |
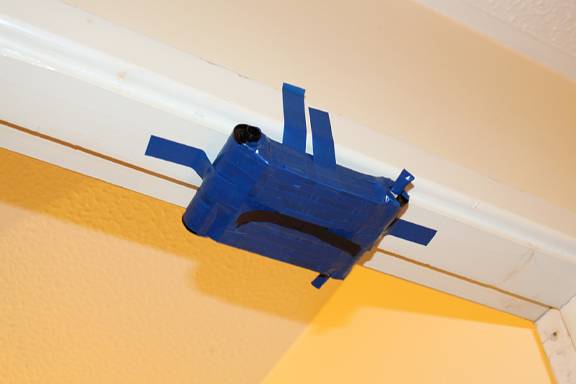
This shoebox pinhole camera can be made with everyday household items, in just six simple steps. Complete the project in an afternoon, and you can take photographs from your very own camera by the next day.
This camera works best when it is secured to a tripod.
9. Foldable Pinhole Camera by Instructables

| Materials: | A cardboard box, black Bristol board, cloth hockey tape or black duct tape, white glue, empty pop tin, photographic paper |
| Tools: | Ruler, sewing needle, small clamps |
| Difficulty Level: | Moderate |
If you thought that building your own pinhole camera would be impressive, try making a foldable pinhole camera. With just a few materials, household tools, a little time, and this plan, you can produce some very vintage-looking photographs, with a vintage-looking camera.
10. Juicebox Pinhole Camera by Instructables

| Materials: | An empty juice box, empty soda can, black tape, film reel, empty film reel |
| Tools: | Ruler, X-ACTO knife, pen or sharpie |
| Difficulty Level: | Moderate |
Maybe a shoebox, or even a cereal box, is too big for what you’re looking for. Well, homemade pinhole cameras don’t have to be big, and this plan shows you how to turn a juice box into a pinhole camera.
The smaller scale does make this project a little more intricate, which is why we label it as moderate difficulty. But with some patience, and good hand-eye coordination, you can build this little camera in just a few hours.
11. Jello Box Pinhole Camera by lilblueboo
| Materials: | A large Jello pudding box, aluminum foil, empty film canister, wooden clothespin, black spray paint, tape, black paper, 35mm film |
| Tools: | Ruler, sewing needle, sandpaper, pliers, scissors, marker |
| Difficulty Level: | Easy |
This plan is for a medium-sized cardboard pinhole camera that uses 35mm film.
The box camera looks similar in shape and size to the old disposable cameras, and the resulting photographs are pretty impressive. This camera works especially well with Lomography films.
12. Wide Angle Pinhole Camera by lilblueboo

| Materials: | Metal coffee can, black spray paint, wood clothespin, sandpaper, cardstock, black tape, black paper |
| Tools: | Sewing needles, sharpie |
| Difficulty Level: | Easy |
The great thing about using a small metal can, is that the curved shape gives it the effect of using a wide-angle lens.
This plan is easy to make, though the smaller details require time and patience. The end product, however, is well worth it.
13. How to Make a Shoebox Pinhole Camera by WikiHow

| Materials: | Shoebox |
| Tools: | Sewing needles, sharpie, scissors, craft knife |
| Difficulty Level: | Easy |
Pinhole cameras are great when they can produce actual photographs, but even without that function, they can be used to demonstrate how light, and the eyes, work. This plan guides you through making a pinhole camera for demonstration, then goes further to explain how to turn it into a functioning camera.
14. Panoramic Pinhole Camera by DIYPhotography
| Materials: | Stock board, popsicle sticks, colorful plastic sheets, an empty soda can |
| Tools: | Sewing needles, sharpie, scissors, craft knife |
| Difficulty Level: | Moderate |
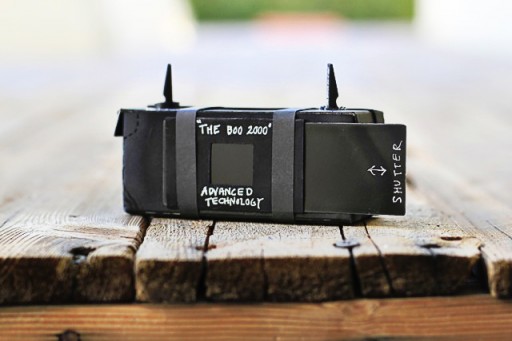
This little camera has a unique sliding mechanism for closing and opening the shutter, made from popsicle sticks. The final product produces some great quality photographs, ready to hang on your fridge.
15. Recycled Packaging Pinhole Camera by PetaPixel
| Materials: | A small mailing box, black tape, foam, parcel tape, aluminum foil |
| Tools: | Ruler, scissors, sharp knife, pen, pin, sandpaper |
| Difficulty Level: | Easy |
Next time you get a nice, sturdy box delivered to your home, maybe you can use it to create this easy-to-build pinhole camera.
This plan gives a clear list of instructions, so all you need to do is gather a few items and follow along.
16. Instant Pinhole Camera Tutorial by Sidseltilotte
| Materials: | An Instant Back+, a box, cardboard, aluminum foil, black tape, black paint, instant film |
| Tools: | A needle, black tape, scissors, brush |
| Difficulty Level: | Moderate |
This plan takes an instant camera and converts it into a pinhole camera with a few simple steps. The advantage of creating a pinhole camera in this way is that the photographs are easy to develop. Using this film will result in photos that have a slightly inverted, negative-like quality to them.
17. Cardboard Cyanotype Camera by Makezine
| Materials: | Lens, cardboard boxes, cyanotype paper, duct tape |
| Tools: | Box cutter, ruler |
| Difficulty Level: | Moderate |
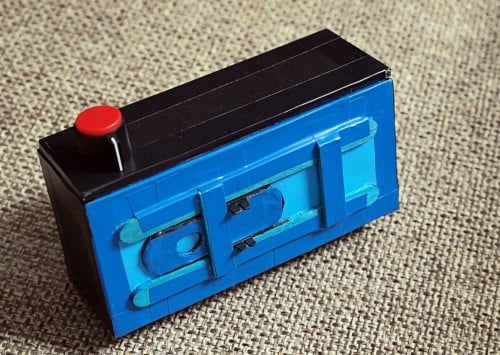
Cyanotype cameras use a non-silver photographic process. Known also as blueprints, the cyanotype method is easy, and produces striking, blue-tinted photographs, with deep expressive beauty.
Using a lens from a magnifying glass can take your pinhole cyanotype camera to a whole new level. Experimenting with cyanotype is a must for photography enthusiasts, and this plan will show you how you can, with just a few materials.
18. Wooden Pencil Box Pinhole Camera by abeautifulmess
| Materials: | Wooden pencil box, black foam board, 35mm film, empty soda can, craft foam, wooden dowel, wooden spool, metal nut, washer, black paint |
| Tools: | Needle, brush, craft glue, scissors, craft knife |
| Difficulty Level: | Moderate |
If you’re looking for style as well as functionality, then this plan may be what you’re looking for. Using a store-bought wooden pencil box creates a very elegant and slender finish for this working pinhole camera.
19. Matchbox Pinhole Camera by Ed Piel
| Materials: | Empty soda can, small matchbox, 35mm film, old film canister, plastic page binder, black tape |
| Tools: | Black marker, scissors, craft knife, pen, sewing pin, ruler |
| Difficulty Level: | Moderate |
The principles of pinhole photography don’t change, no matter how much they are scaled up, or down. This plan is for creating a pinhole camera using a matchbox. The steps are easy to follow, however, the small size of the project requires precision.
20. Ultra-Large-Format Pinhole Camera by Petapixel
| Difficulty Level: | Hard |
This ultra-large format camera is the perfect project for DIY enthusiasts. The folding bellows on this camera allow it to be compressed and extended, changing the focal length, and therefore altering the depth of field.
Final Thoughts
Crafting a pinhole camera is a rewarding project, and with so many plans available, there’s a plan out there for every level of ability. It doesn’t need to be an expensive project either, with so many of the classic shoebox methods using only a handful of household items!
Featured Image Credit: Camillo Kearns, Shutterstock
Table of Contents
- 20 DIY Pinhole Camera Plans
- 1. Instant Pinhole Camera by Lomography
- 2. Dual Filmed Pinhole Camera by Lomography
- 3. Paint Can Pinhole Camera by Lomography
- 4. Pinhole Camera for Black & White Photos by Instructables
- 5. Homemade 35mm Box Camera by Instructables
- 6. Design and Build Your Own Pinhole Camera by Instructables
- 7. Build an Anamorphic Pinhole Camera by Instructables
- 8. Shoebox Camera by Instructables
- 9. Foldable Pinhole Camera by Instructables
- 10. Juicebox Pinhole Camera by Instructables
- 11. Jello Box Pinhole Camera by lilblueboo
- 12. Wide Angle Pinhole Camera by lilblueboo
- 13. How to Make a Shoebox Pinhole Camera by WikiHow
- 14. Panoramic Pinhole Camera by DIYPhotography
- 15. Recycled Packaging Pinhole Camera by PetaPixel
- 16. Instant Pinhole Camera Tutorial by Sidseltilotte
- 17. Cardboard Cyanotype Camera by Makezine
- 18. Wooden Pencil Box Pinhole Camera by abeautifulmess
- 19. Matchbox Pinhole Camera by Ed Piel
- 20. Ultra-Large-Format Pinhole Camera by Petapixel
- Final Thoughts
About the Author Cheryl Regan
Cheryl is a freelance content and copywriter from the United Kingdom. Her interests include hiking and amateur astronomy but focuses her writing on gardening and photography. If she isn't writing she can be found curled up with a coffee and her pet cat.
Related Articles:
Monocular vs Telescope: Differences Explained (With Pictures)
Can You Use Binoculars to Look At Stars? How to Choose the Right Pair
How to Clean a Refractor Telescope: Step-by-Step Guide
How to Clean a Telescope Eyepiece: Step-by-Step Guide
How to Clean a Rifle Scope: 8 Expert Tips
What Is a Monocular Used For? 8 Common Functions
How to Clean a Telescope Mirror: 8 Expert Tips
Brightfield vs Phase Contrast Microscopy: The Differences Explained