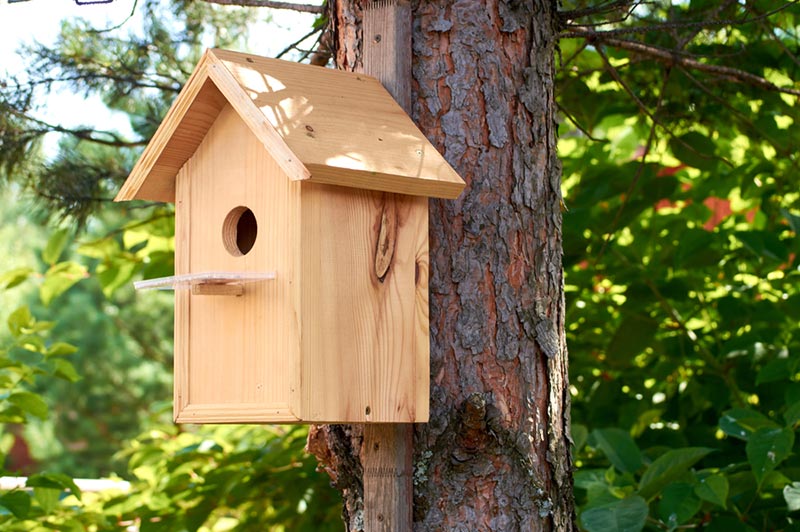
7 DIY Cedar Birdhouse Plans You Can Make Today (With Pictures)
Last Updated on

Birdhouses are the perfect way to compliment the wildlife that roams in your backyard. Cedar is arguably the best wood you can use to build your birdhouses since it’s lightweight and durable compared to other options. Whether you have cedar on hand or are thinking of using it to build your next DIY birdhouse, we have seven plans you can work on today.
See below to learn more!

The 7 DIY Cedar Birdhouse Plans
1. Box House
| Materials: | Cedar picket, nails |
| Tools: | Miter saw, nail gun, drill bit |
| Difficulty: | Beginner |
The most inexpensive and practical way to build your cedar birdhouse is to make a simple box. This can be easily done with a single cedar picket and a few industrial tools. Ana White, the creator of this plan, claims that this will total less than $10 for the whole project, and it’s the best design a beginner can make without worrying about costly mistakes. It can be mounted to a tree, hung, or made to stand freely.
2. Basic Birdhouse
| Materials: | Cedar picket, nails, glue |
| Tools: | Miter saw, nail gun, drill bit |
| Difficulty: | Beginner |
Our second pick is the classic two-sided roof birdhouse. Although it has been around for a while, this plan is also from Ana White, using many of the same materials and methods as the box house. It has the same advantage of being a low-cost, beginner-friendly option but with a slightly different roof style. The angled edges make it more challenging than the box house, but it’s still relatively simple and shouldn’t take too long to craft.
3. Rustic Birdhouse
| Materials: | Cedar picket, stencil, nails |
| Tools: | Miter saw, jigsaw, drill bit, nail gun |
| Difficulty: | Moderate |
This old-fashioned birdhouse also uses a cedar picket as its primary construction. The blueprint for this design can be followed by watching this video tutorial by Mark Dohring. Using a miter saw, the cedar picket is measured and cut into separate chunks, with some outlines of the frame attached afterward. Since the shape has a curve, fitting the smaller wood pieces can be tricky. This plan is best for people with plenty of carpentry equipment. Luckily, you may have some cedar left over that can be used for other projects too!
4. Penny-Roof Birdhouse
| Materials: | Strong adhesive glue, pennies |
| Tools: | None |
| Difficulty: | Beginner |
For DIYers who want to make use of their loose change, this is the perfect idea for you. Since it will only cost you slightly more than a regular cedar birdhouse, it’s worth the extra penny (no pun intended). This is best suited for a pre-built cedar birdhouse, preferably with a slanted roof. We recommend you build the basic birdhouse we went over earlier and add to it with this plan. It’s always a good idea to clean the pennies off before you begin.
5. Slanted-roof Birdhouse
| Materials: | Cedar picket, nails |
| Tools: | Saw, drill bit, nail gun/hammer, stencil |
| Difficulty: | Beginner |
Slanted-roof birdhouses are quite common and often used for bluebird trails. They are built similarly to the box style but are usually a better choice because the rain can go down the slant. DIYWithWayne explains the process in video format, with details about tools and how to cut each piece and fit them accordingly. The slant is at a 20° angle, so it won’t require too much expertise to construct.
6. License Plate Birdhouse
| Materials: | License plate, adhesive glue, dowel |
| Tools: | Power drill |
| Difficulty: | Beginner |
Like the penny-roof design, this plan can be made with a pre-built cedar birdhouse, or you can craft it from scratch and read the quick tutorial to get started. Just remember to leave the roof to the side so you can use the license plate in its place. The license plate can be bent and adjusted to whichever roof you have, and all you need to finish it off is a few screws and a power drill. It’s a great DIY project that uses old material around the house instead of contributing to landfills of scrap metal.
7. Multi-House Design
| Materials: | Cedarwood, dowels, screws, varnish |
| Tools: | Miter saw or table saw, power drill |
| Difficulty: | Advanced |
If you have a lot of bird families to house, this is the best plan on the list for you. Instead of building a singular birdhouse, you can combine several of them together to create the ultimate multi-bird unit. As you can see in this video made by Memphis Applegate, the three main houses are the same design as the slanted-roof plan, with the addition of the standard roof at the center. There are dowels in this plan as well, so your birds can perch effortlessly.

Final Thoughts
Cedar is a great wood for birdhouses for many reasons, and you may have some on hand that you can’t wait to use. Our seven DIY cedar birdhouse ideas can be built with power tools or minimal hand tools, and there’s something for everyone: different styles, budgets, and levels of expertise. Remember to practice safe protocols when creating your DIY projects, and of course, have fun!
Featured Image Credit by: Ivan Serebryannikov, Shutterstock
About the Author Robert Sparks
Robert’s obsession with all things optical started early in life, when his optician father would bring home prototypes for Robert to play with. Nowadays, Robert is dedicated to helping others find the right optics for their needs. His hobbies include astronomy, astrophysics, and model building. Originally from Newark, NJ, he resides in Santa Fe, New Mexico, where the nighttime skies are filled with glittering stars.
Related Articles:
Monocular vs Telescope: Differences Explained (With Pictures)
Can You Use Binoculars to Look At Stars? How to Choose the Right Pair
10 Types of Hummingbirds in Arkansas (With Pictures)
8 Types of Hummingbirds in Nebraska (With Pictures)
5 Types of Hummingbirds in Idaho (With Pictures)
3 Types of Hummingbirds in Mississippi (With Pictures)
8 Types of Hummingbirds in Kansas (With Pictures)
5 Types of Hummingbirds in West Virginia (With Pictures)
