What Is an Infrared Camera & How Do They Work?
Last Updated on

Infrared light is located on the spectrum just below red visible light but above microwaves. Invisible, its wavelength is longer than visible red light’s wavelength, and in astronomy it’s frequently referred to as “red shift.” Most cameras intended for general photography have a filter on their sensors which block infrared light, but you can buy an infrared camera or a regular camera that’s been converted to infrared which will block all types of light except for infrared.
If you’re unsure if infrared is the right type for you, you can buy a removable filter to temporarily use on your regular camera which will give you an infrared effect using the long red wavelengths of visible light, without permanently altering your camera with an IR conversion. Here’s a snapshot of what to expect from an infrared camera—as well as how they work and what they’re used for—to determine if this is the right type of camera for you.

How Does It Work?
Most cameras block infrared light, but infrared cameras block every type of light except infrared light. Regardless of whether you have a DSLR or mirrorless, your camera is equipped with a Bayer filter which goes on top of the CCD or CMOS sensor to sort the light colors. Camera sensors are organically sensitive to all light, but built-in filters that go on top of the Bayer filter to block infrared light, allowing only visible light waves to show up on your film or digital photo.
An infrared camera, by contrast, filters out every type of light (including visible light) except for IR. Some companies make cameras specifically for IR photography, or you can send your pre-owned camera to a shop for an IR conversion.
What Are the Different Types of Infrared Cameras?

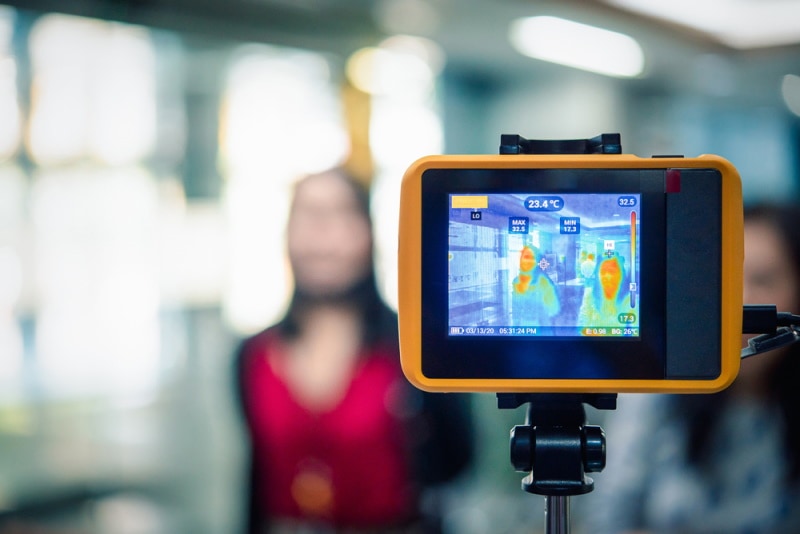
Any camera has the potential to be an infrared camera. A camera may be originally designed to be infrared, or they could be general converted cameras who had their infrared filters taken off later. The conversion process takes off the filter that blocks infrared light, which results in either no filter (collects full spectrum) or replaced with another filter that blocks all light except for the desired part of the spectrum (infrared or ultraviolet). A professional infrared camera for military and police work can cost thousands of dollars, but hobby infrared cameras can be as little as $300. These cameras are also known as “thermal cameras” because infrared light is a form of heat.
How Much Does Infrared Conversion Cost?
Capturing a photo in infrared can be a costly endeavor. An IR conversion can cost between $200-$400, but you’ll need to get a specific quote for your camera to be exact. Lifepixel is one of the top companies who specialize in IR conversions. While they can take around a month to work on your camera, most customers seem to be pleased with the results.
To capture IR light on your regular camera, you’ll need to send it to a company that specializes in camera conversions to either simply remove the IR filter, which will give you a full spectrum camera, or remove the IR filter and replace it with another filter to block out every type of light except for infrared. This will give you a fully converted IR camera.
Since regular cameras can receive near-infrared light, you can put on a Hoya R72 infrared filter to experiment without investing in an expensive conversion. The Hoya R72 blocks all visible light except near-infrared light, which are long red wavelengths. This lens experiments with the sliver of the light spectrum between infrared light and visible light. This results in extremely dark photographs that are good for creative landscape and cityscape photography, but not useful for portraiture or subjects that don’t sit still for long (ie., your rambunctious cat). However, it’s useful just to dip your toes before you convert to an infrared camera or infrared conversion.
If you use a non-converted camera with an IR filter, you’ll need to focus the image before you add the filter since the viewfinder will be too dark to see. The reason for the long process is that infrared light has a focal point further from the sensor, which will create an out of focus image. You must focus with visible light, then adjust your focusing ring to line up with the infrared marker (if your lens has one) before you add the IR filter. This is another reason IR photography works better with stationary subjects, especially if you’re using a regular camera with an IR filter.

Where Is It Used?

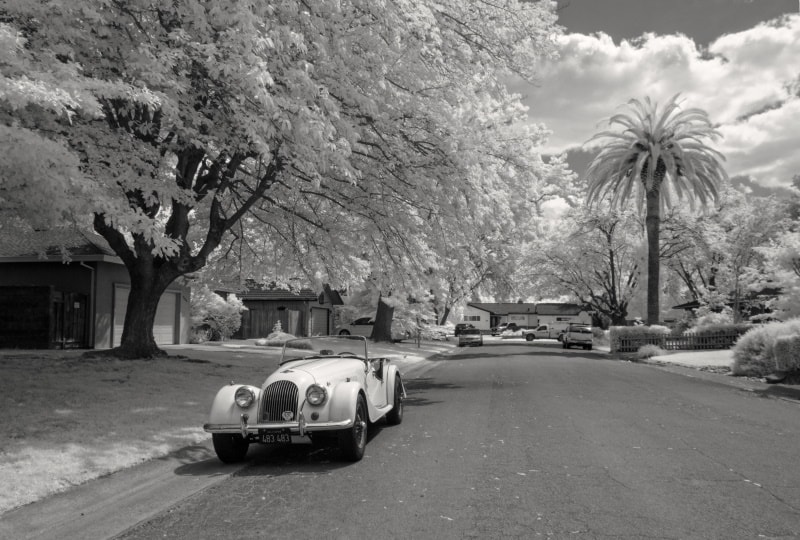
You may desire to use an IR camera or Hoya R72 infrared filter for artistic effect. Infrared photography turns a photo red, and edited infrared photos can turn black and white with an awesome contrast if you apply the correct filters. If you take a picture using an infrared camera on a cloudy day, the sky will be black, and the clouds will be a bright white. Foliage with chlorophyll reflects infrared light, so leaves will glow and be bright. Opportunities abound for creative nature and landscape photography, so you might enjoy an infrared camera if you like to take unusual pictures of buildings and plants.
Advantages of An Infrared Camera
An infrared camera draws many photographers in with the appeal of taking pictures in wavelengths that our eyes can’t detect. Even forensic investigators use infrared cameras to detect blood and fingerprints not visible with regular cameras.
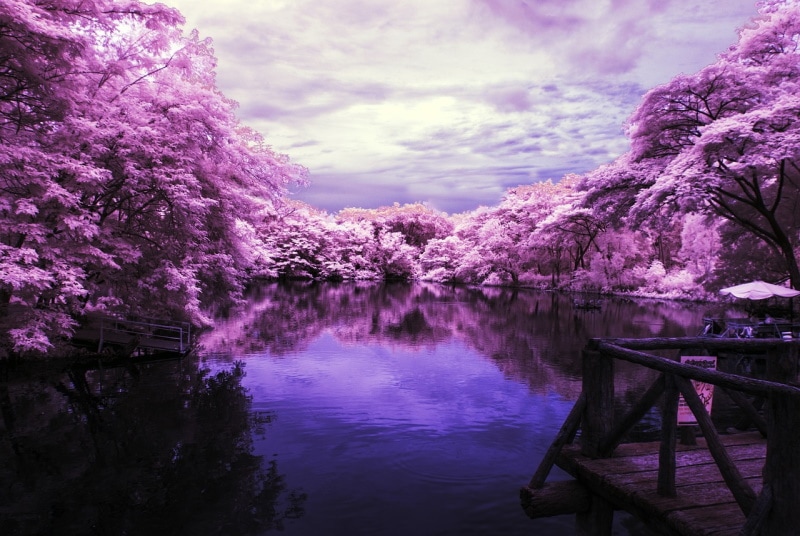
Some photographers like the red shift effect because it results in high contrast images that they can later edit to either turn black and white, or artificially add color for a psychedelic effect. Early Hollywood movies and album covers from the 1960s employed this effect to give a “dream” landscape. The “red shift” appropriately sounds like something from a sci-fi movie because it gives us a glimpse of an invisible world.
Disadvantages of An Infrared Camera
Every photographer knows that editing is a huge part of the business but editing an infrared photo can be an especially laborious task. To edit an infrared photo, you’ll need to open up a photo editing software, and swap the red and blue channels. Depending on the program, you may need to use another program to make a custom white balance preset because some editing software such as Adobe Lightroom doesn’t include the required preset. Once you have your white balance preset, you can now edit your photo as you normally would.
Infrared cameras are designed to take pictures of light in that spectrum. Infrared light is also more susceptible than visible light to hot spots and lens flares, which will result in a bright spot of light on your picture. Do some research on your camera’s primary lens to see if it’s prone to hot spots before you decide on an IR conversion. You also may want to consider only converting a used or secondary camera since conversions will void your camera’s warranty if it has one. Because snapping and editing the shot can take longer than the process for a regular photo, infrared isn’t a good option for photographers who need to take and deliver their products quickly, such as portrait photographers.

Frequently Asked Questions (FAQs)

Are IR conversions worth it?
The answer probably depends on what you use your camera for, and whether it’s still covered by a warranty. IR conversions can be a great choice if you want to experiment with artistic effects on stationary objects but aren’t what you want if you use your camera for taking pictures of humans or animals. IR photography doesn’t generally give you good pictures of living objects, as it takes a long time to both snap the photo and edit, and the focus is different. Also, IR conversions will void your new camera’s warranty, so we’d recommend doing it on older, secondary cameras to give them a new purpose.
Are IR conversions expensive?
Considering the price of an actual camera, IR conversions are fairly affordable, ranging between $200-$400. However, since an IR camera can be used for only limited uses, it’s still a high price if you’re an amateur photographer on a budget. If you want an IR effect with the conversion cost, consider buying a used Hoya R72 infrared filter to use on your regular camera.
Will an IR conversion permanently alter my camera?
Yes. An IR conversion is pretty much irreversible, as it removes a filter that came with your camera. If you’re not sure about infrared photography, you can always find a cheap Hoya R72 infrared filter to get an otherworldly effect without the cost or commitment of a full conversion.
How much does an IR camera cost?
You can buy an infrared camera, also called a thermal camera, for as little as a couple hundred bucks or as high as several thousand for professional or military grade.
A Quick Reference Guide
| Advantages of Infrared Photography | Advantages of Full Spectrum Photography | Advantages of General Photography with An Unconverted Camera |
| High-contrast images result in stark black and white photos | UV capability makes it a great option for Astrophotography | Quicker process |
| Editing can create surreal artificial color effects with high contrast | Flexibility of having any light spectrum, from normal to ultraviolet or infrared | An infrared filter such as the Hoya R72 is still a budget option that will give you an infrared camera effect without an expensive conversion |
| Captures wavelengths that are invisible to the human eye | Features all the advantages of infrared and general photography | Better for taking pictures of people and animals without paying for a conversion |

Final Thoughts
Infrared is a favorite for photographers who want a fantasy or surreal aesthetic, but an infrared conversion can be a costly and semi-permanent procedure. If you’re unsure of whether infrared is the right choice for you, it might behoove you to invest in a cheaper Hoya R72 infrared lens to test out infrared photography on your normal camera before diving into a conversion. If you do decide to convert your camera, expect to pay between $200 and $400 to get the job done.
Featured Image Credit: PongMoji, Shutterstock
About the Author Brooke Bundy
Brooke Bundy is a freelance writer who lives with three cats and a dog. She attended the University of North Georgia where she acquired a B.S. in Media Studies. Booke loves storytelling and spending time with her pets at their house in New Orleans, Louisiana. In her free time, she enjoys gardening, cooking, and brewing coffee.
Related Articles:
Binocular Magnification Chart: Numbers & Distances Compared
What Is the Best Binocular Magnification for Hunting? Optical Features Explained
When Were Binoculars Invented? History, Today & Future
How to Clean a Refractor Telescope: Step-by-Step Guide
How to Clean a Telescope Eyepiece: Step-by-Step Guide
How to Clean a Rifle Scope: 8 Expert Tips
Monocular vs Telescope: Differences Explained (With Pictures)
What Is a Monocular Used For? 8 Common Functions
